Accessing Teams
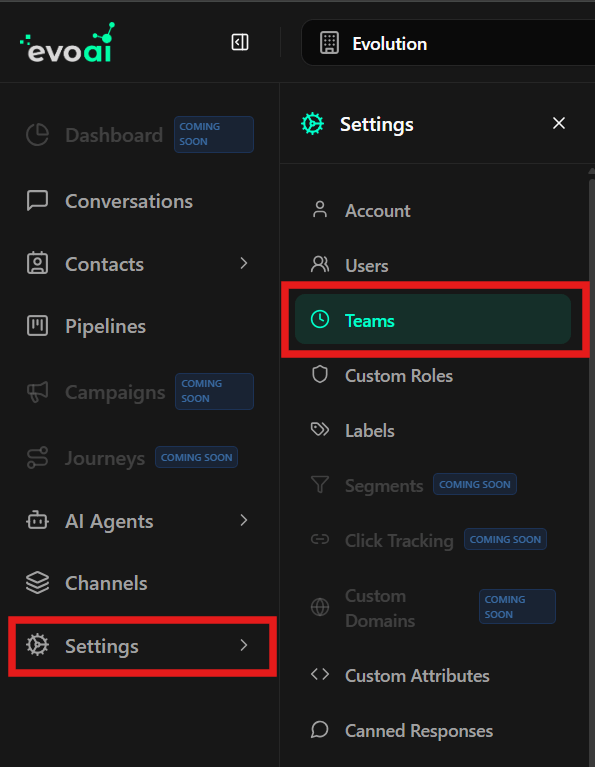
To access team management, follow the steps below:- In the left sidebar menu, click Settings.
- In the submenu that opens, click Teams.
Creating a New Team
To create an organizational structure:- Click the + New Team button in the top right corner or in the center of the screen (if no teams exist).
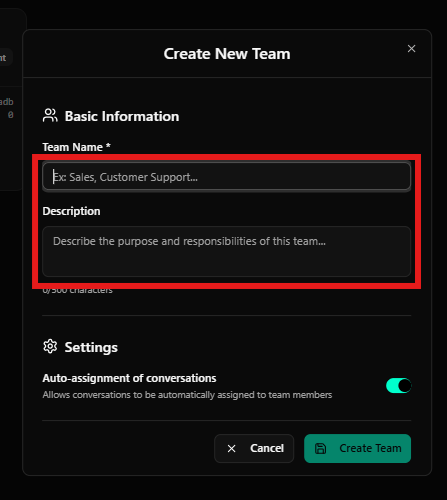
- In the window that opens (Create New Team), fill in:
- Team Name: E.g., Sales, Customer Support.
- Description: Describe the purpose and responsibilities of this team.
- Auto-assignment of conversations: Enable the switch if you want conversations sent to this team to be automatically distributed among members.
- Click Create Team.
Managing Teams
After creation, teams appear in card or list format, where you can:-
Search: Find teams by name using the search bar at the top.
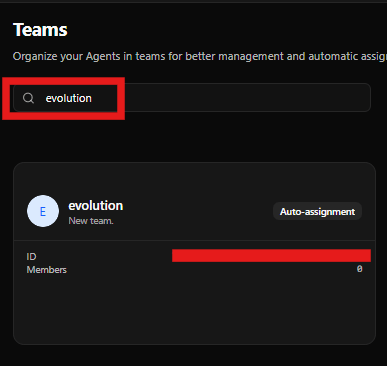
- Member View: The card displays the number of linked agents.
- Auto-assignment: An indicator shows if automatic assignment is active for that team.
Actions and Members
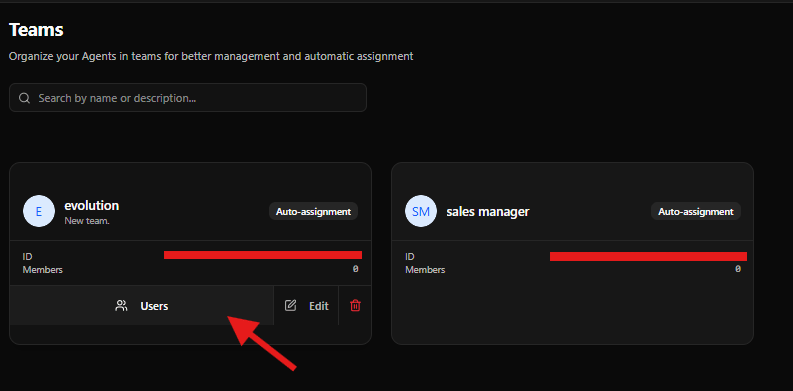
Each team card has action buttons at the bottom:- Users: Click to manage which agents belong to this team.
- Edit: Change the name, description, or assignment settings.
- Delete: Permanently removes the team (trash icon in red).