

Starting a New Channel
To start creating a WhatsApp channel, navigate to the Channels section and click the New Channel button located in the upper right corner of the screen.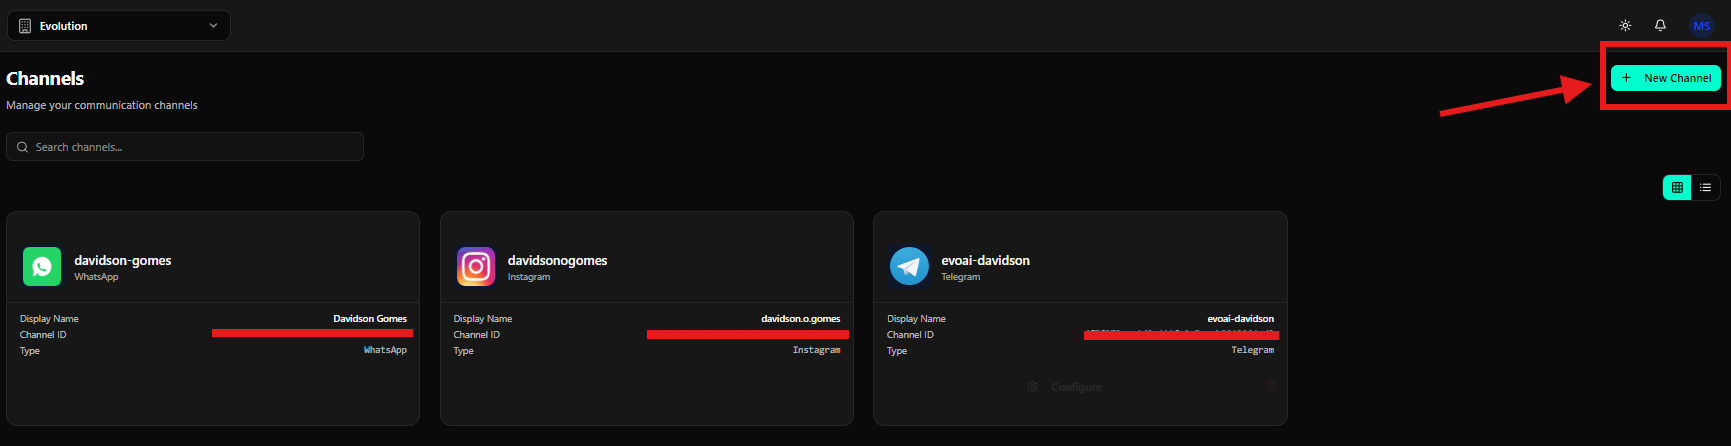
Selecting the WhatsApp Channel Type
On the Select a channel type screen, locate and click the WhatsApp card.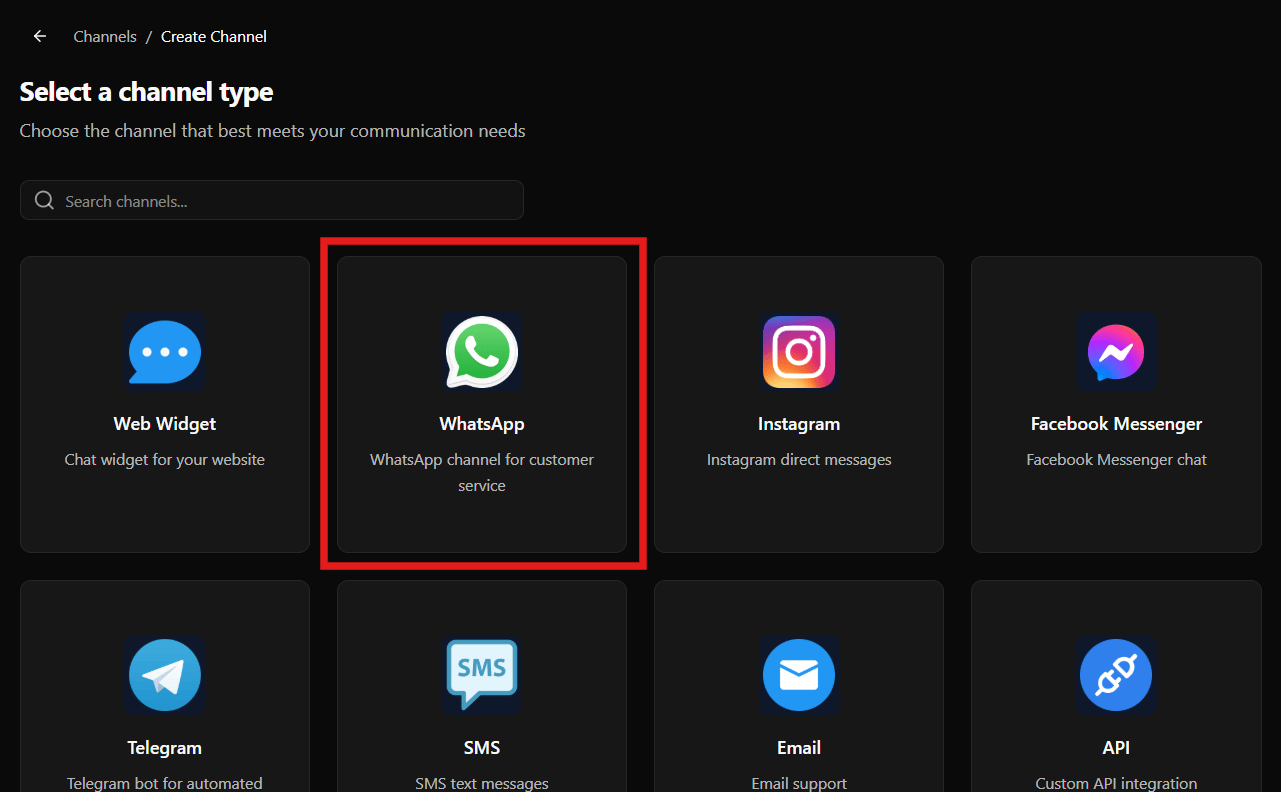
Choosing the API Provider
On the WhatsApp Channel screen, you will see the API Provider section with several available provider options.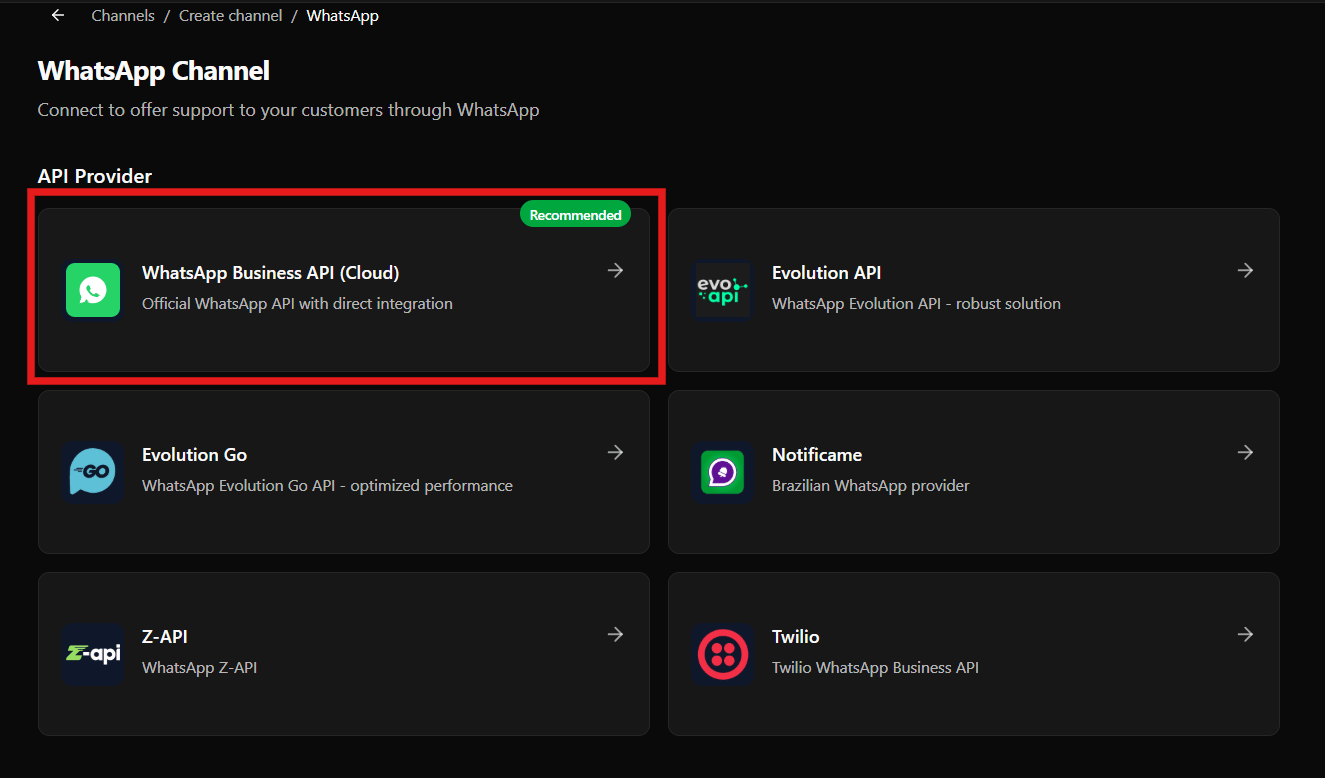
Other Available Providers
Although the recommended option is WhatsApp Business API (Cloud), you can also choose from other providers:- Evolution API: Robust WhatsApp Evolution API solution
- Evolution Go: WhatsApp Evolution Go API with optimized performance
- Notificame: Brazilian WhatsApp provider
- Z-API: WhatsApp Z-API
- Twilio: Twilio WhatsApp Business API
Configuring the Channel
After selecting the provider, the Configure Channel screen will be displayed. This screen allows you to configure the details of your new channel to start receiving messages.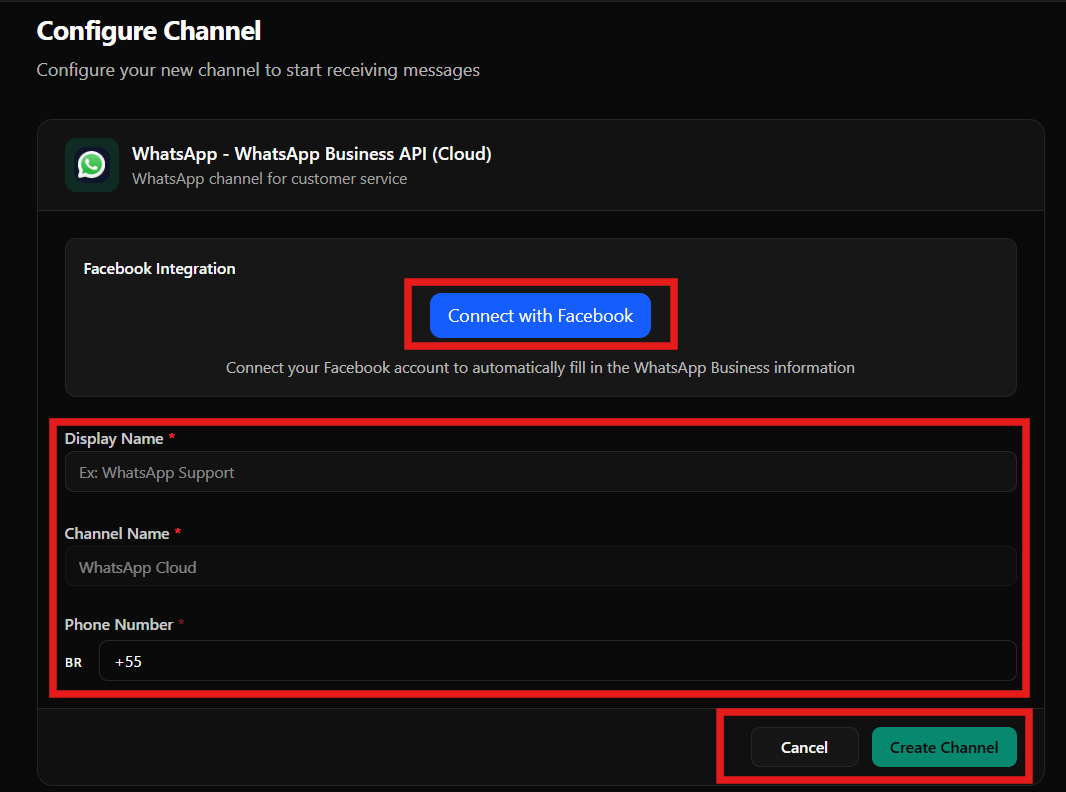
Facebook Integration
In the Facebook Integration section, you will find a Connect with Facebook button. This integration allows you to connect your Facebook account to automatically fill in WhatsApp Business information. Click Connect with Facebook to start the authentication and integration process.Channel Details
In the channel details section, fill in the following required fields:- Display Name: Channel display name (example: “WhatsApp Support”)
- Channel Name: Internal channel name (example: “WhatsApp Cloud”)
- Phone Number: Complete phone number with country code (example: +55 for Brazil)
Action Buttons
At the bottom of the screen, you will find two buttons:- Cancel: Cancels channel creation and returns to the previous screen
- Create Channel: Creates the channel with the provided settings
Connecting with Facebook
When you click Connect with Facebook, a pop-up window will open requesting Facebook login. On this screen, you will need to select your initial setup.Selecting the Setup Type
In the Log In With Facebook window, you will see the question “Select your setup” with two available options: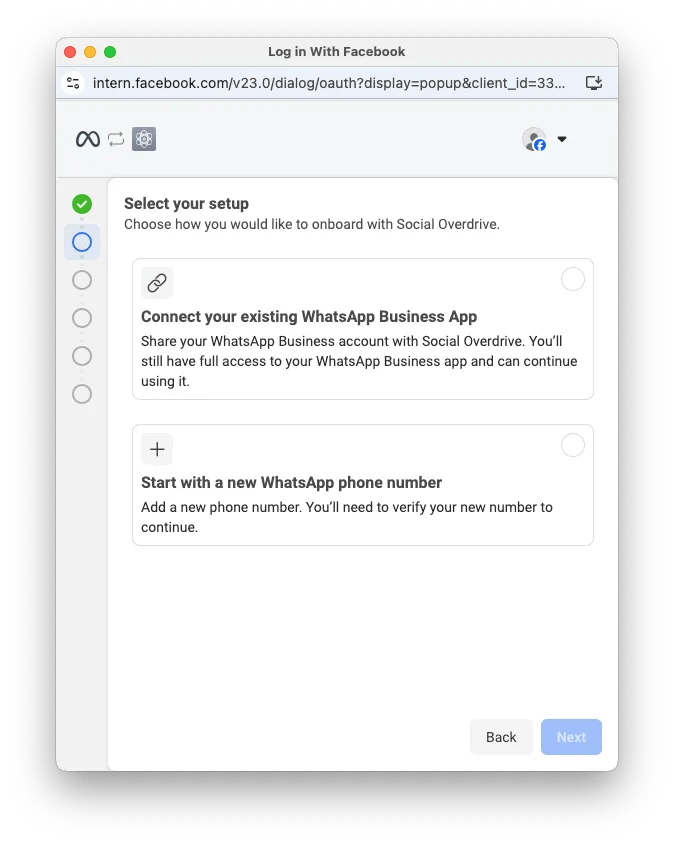
Option 1: Connect your existing WhatsApp Business app
This is the recommended option if you already have a WhatsApp Business account configured. When selecting this option:- You will share your WhatsApp Business account with Evo CRM
- You will still have full access to your WhatsApp Business app
- You can continue using the app normally
Option 2: Start with a new WhatsApp phone number
Choose this option if you want to add a new phone number. You will need to verify your new number to continue. Select the “Connect your existing WhatsApp Business App” option and click Next to proceed.Sharing Contacts and Conversations
After selecting the setup and clicking Next, a new screen will be displayed in the browser requesting sharing of contacts and conversation history. This screen explains that you can:- Import contacts and up to 6 months of conversation history from the WhatsApp Business app to Evo CRM
- Before proceeding, update the app to the latest version
- Look for a message from the official Facebook Business account on WhatsApp and tap Scan QR code
Scanning the QR Code in the App
On your mobile device, open the WhatsApp Business app and look for a message from the official “Facebook Business” account (identified with a blue verification badge).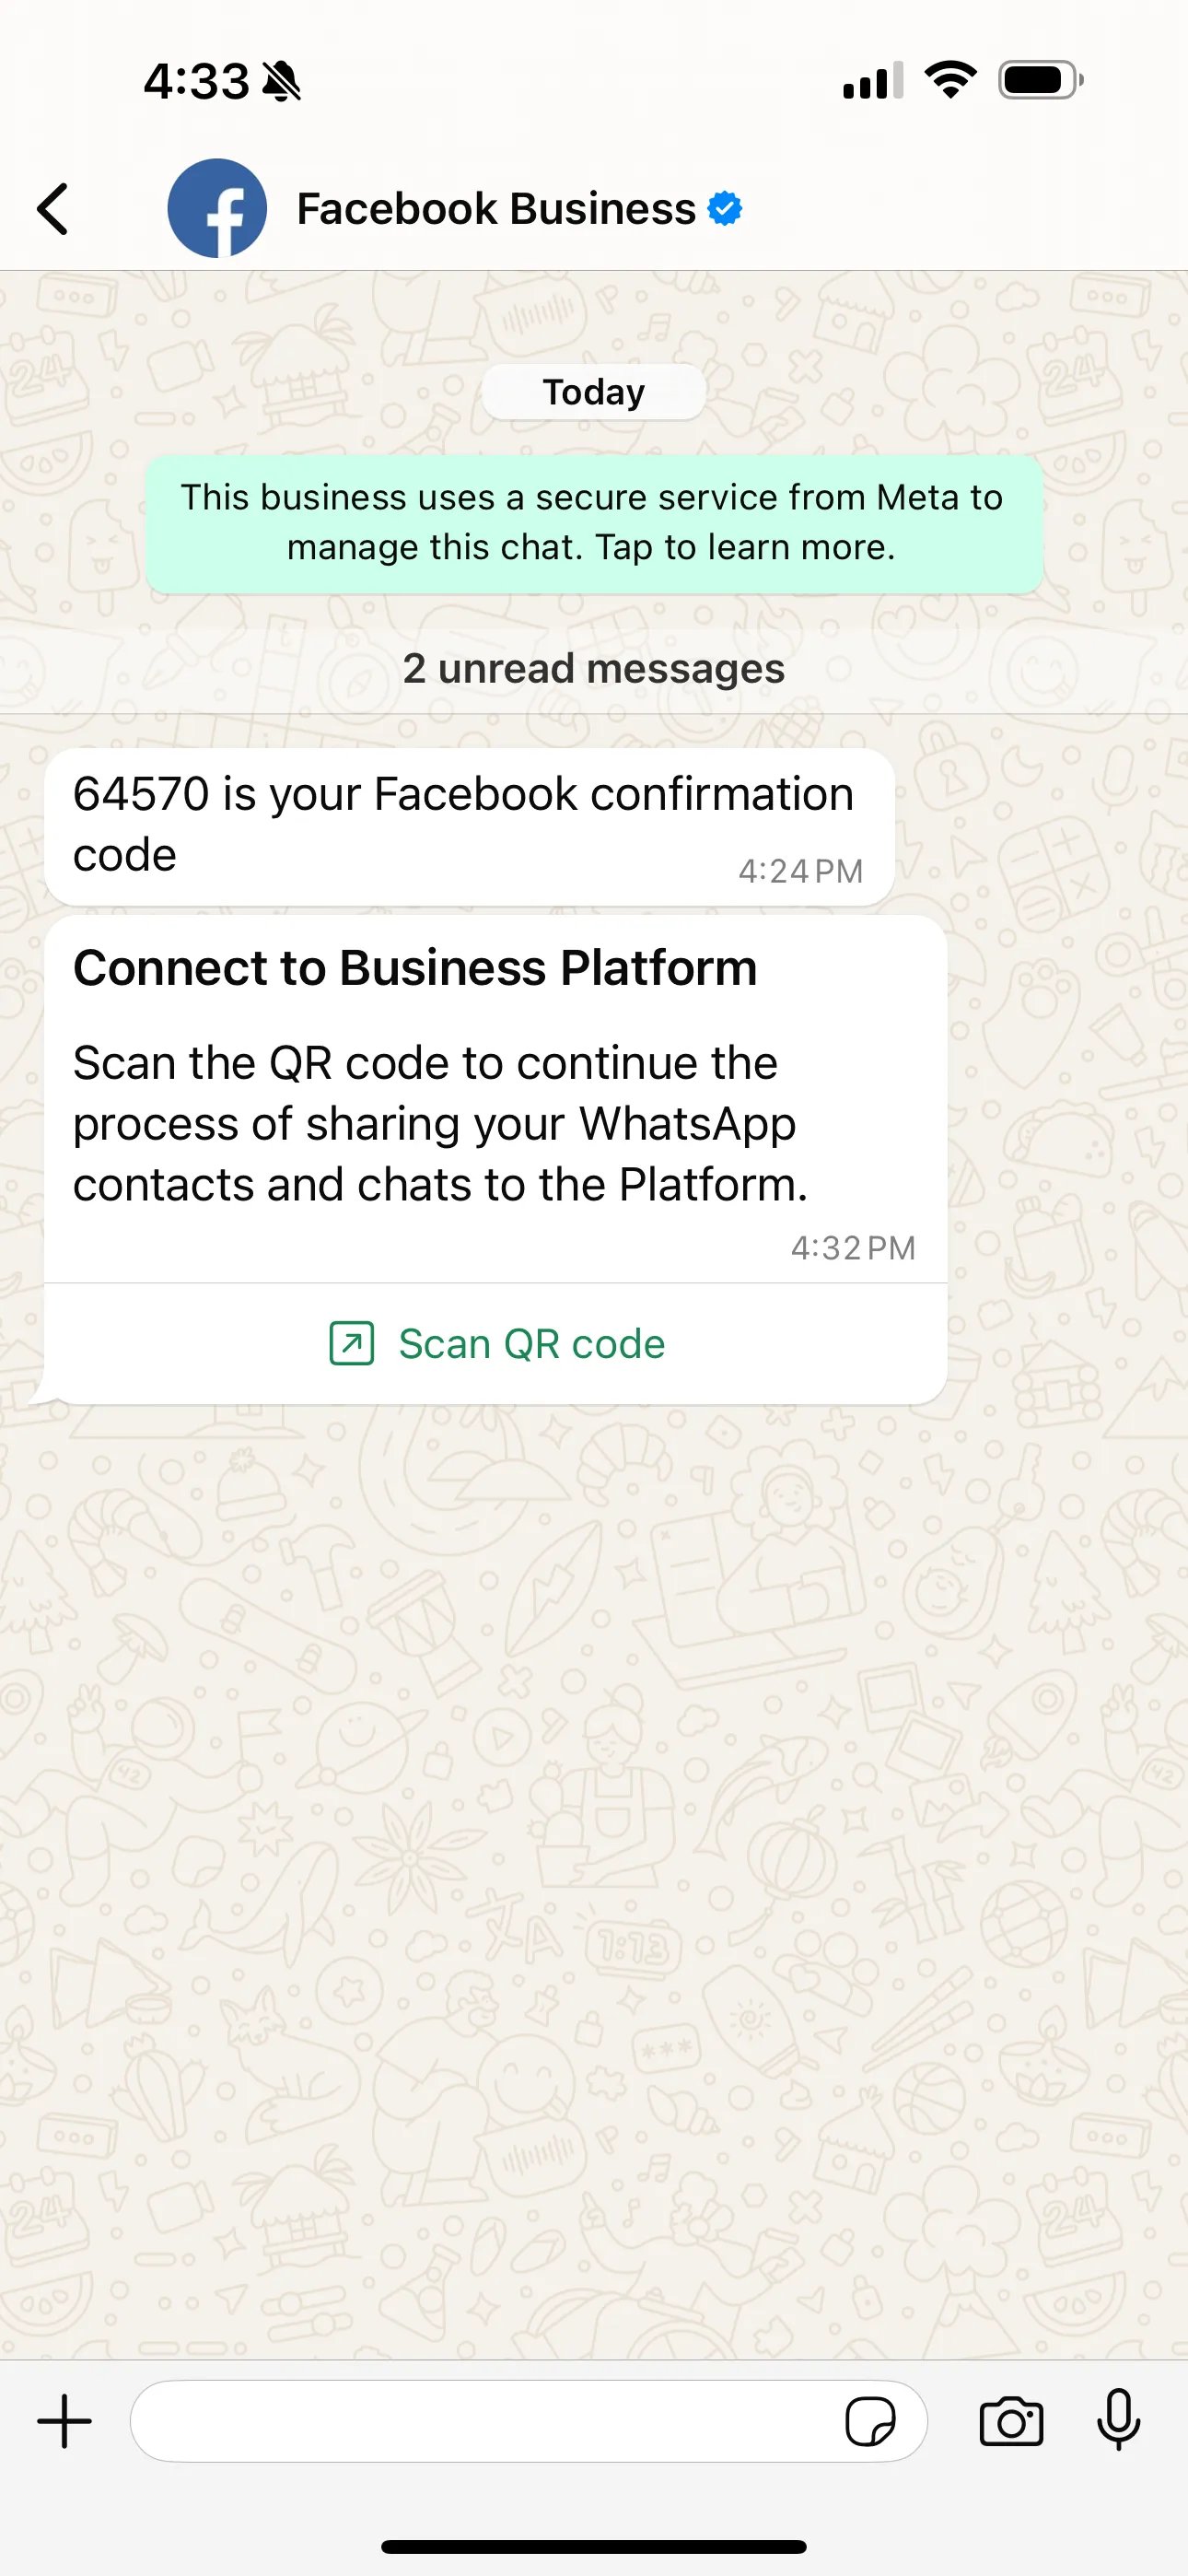
- Confirmation code: A message containing a numeric code (example: 64570) which is your Facebook confirmation code
- Connection message: A message with the title “Connect to Business Platform” instructing you to scan the QR code to continue the process
Connecting to the Business Platform
When you tap “Scan QR code”, the WhatsApp Business app will open the “Business platform” screen.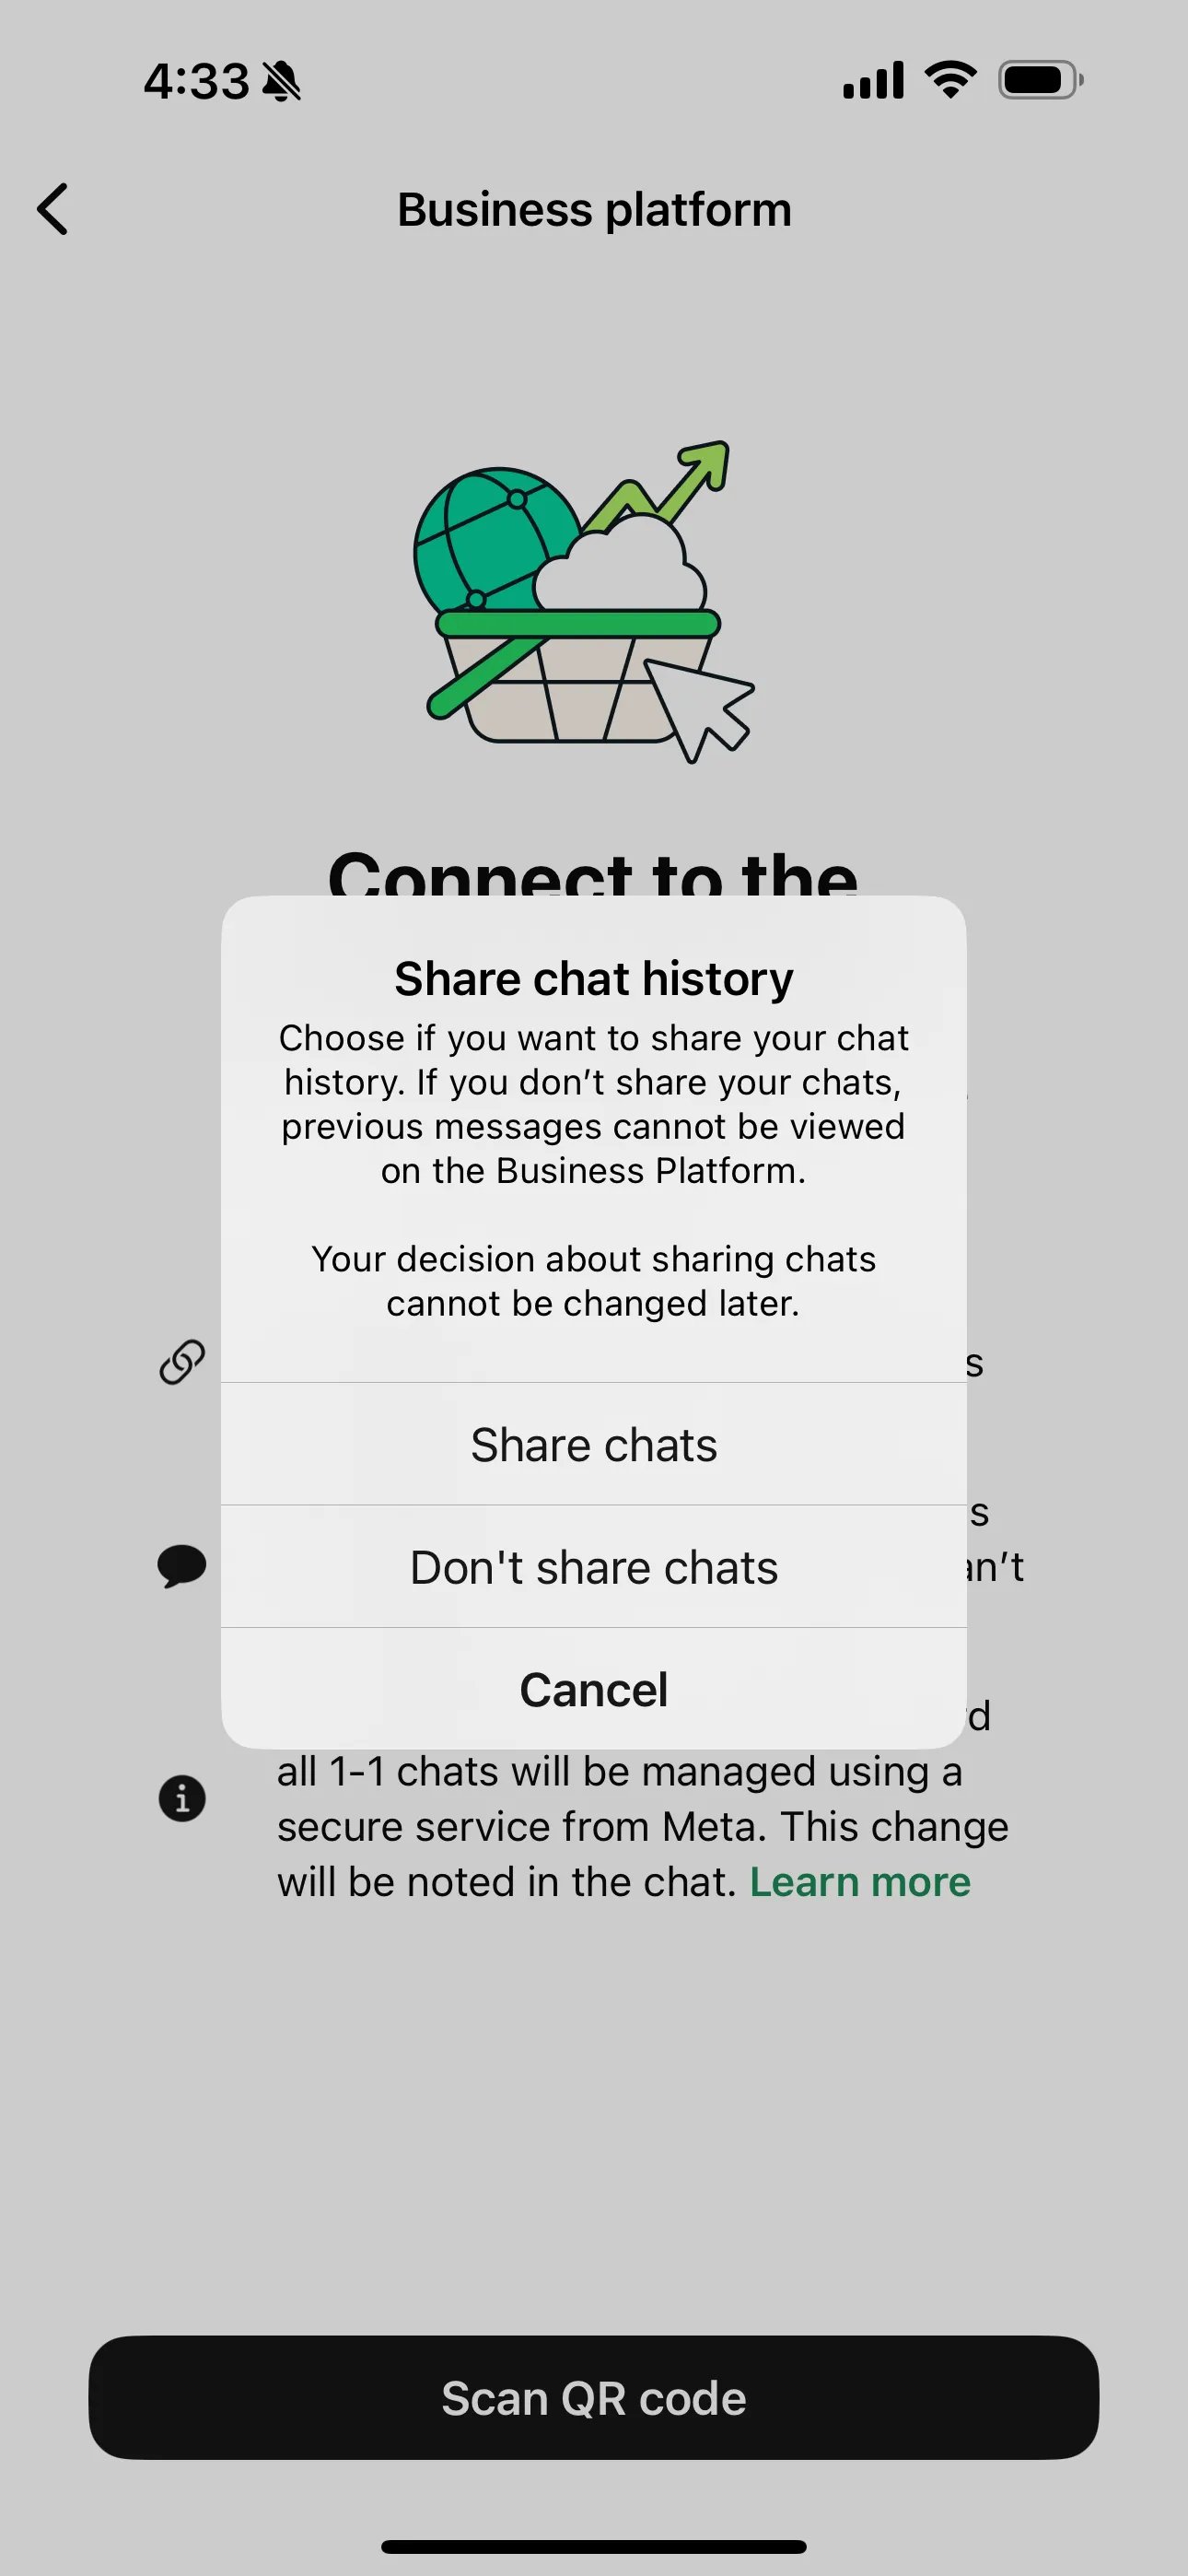
- An illustration representing connection to the business platform
- The title “Connect to the Business Platform”
- The instruction: “Scan the QR code to connect to the Business Platform”
- Important information about using the app and platform together
- A large “Scan QR code” button at the bottom
Deciding on History Sharing
After scanning the QR code, a pop-up will be displayed in the app requesting your decision on sharing conversation history. The “Share chat history” pop-up presents three options:Option 1: Share chats
- Allows sharing up to 6 months of conversation history
- Previous messages can be viewed on the Business Platform
- Important: This decision cannot be changed later
Option 2: Don’t share chats
- Does not share conversation history
- Previous messages cannot be viewed on the Business Platform
- Important: This decision cannot be changed later
Option 3: Cancel
- Cancels the connection process
Finalizing Configuration
After completing the QR code scanning process and deciding on history sharing, you will be redirected back to the channel configuration screen in the browser.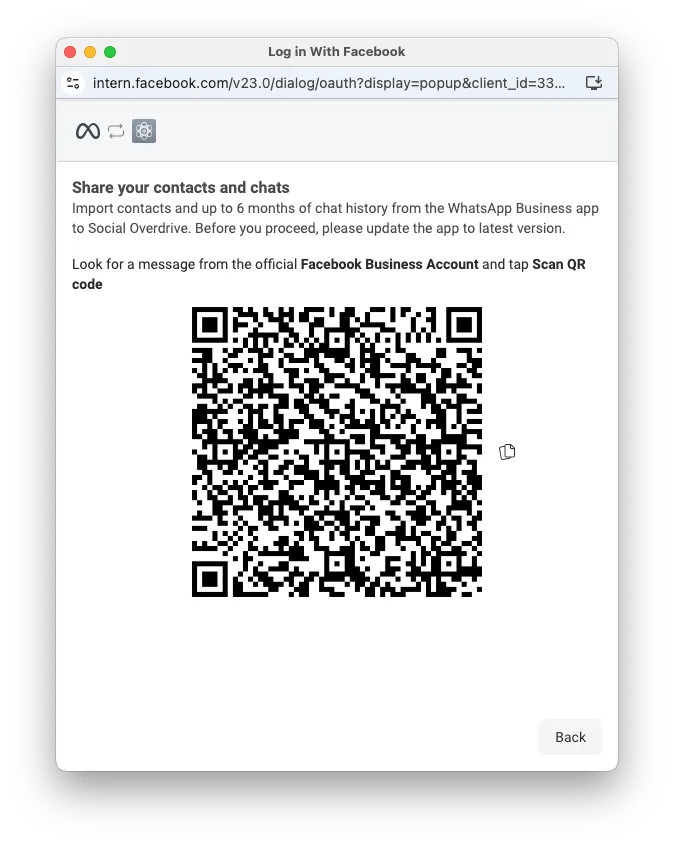
- Display Name: Channel display name
- Channel Name: Internal channel name
- Phone Number: Complete phone number
Final Considerations
- The WhatsApp channel requires a valid WhatsApp Business account
- Facebook integration is necessary to use WhatsApp Business API (Cloud)
- The QR code scanning process must be done in the WhatsApp Business app on your mobile device
- The decision about sharing conversation history is permanent and cannot be changed later
- After configuration, the channel will be available in Evo CRM to receive and manage messages
- You can continue using the WhatsApp Business app normally after connection