

Creating a New Pipeline
To start creating a pipeline, use the highlighted button in the interface.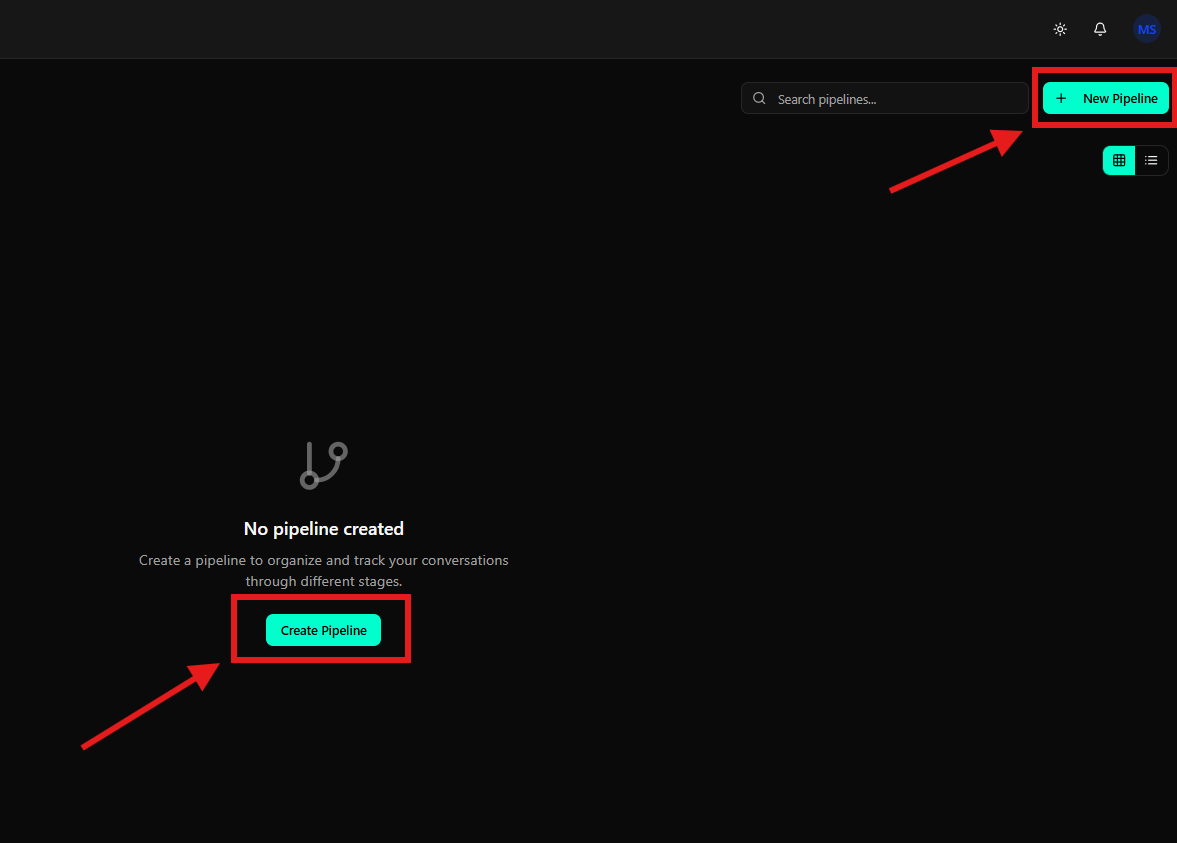
When no pipeline has been created, the Create Pipeline button will also be displayed in the center of the screen.
Configuring Pipeline Information
After starting creation, the pipeline configuration screen will be displayed.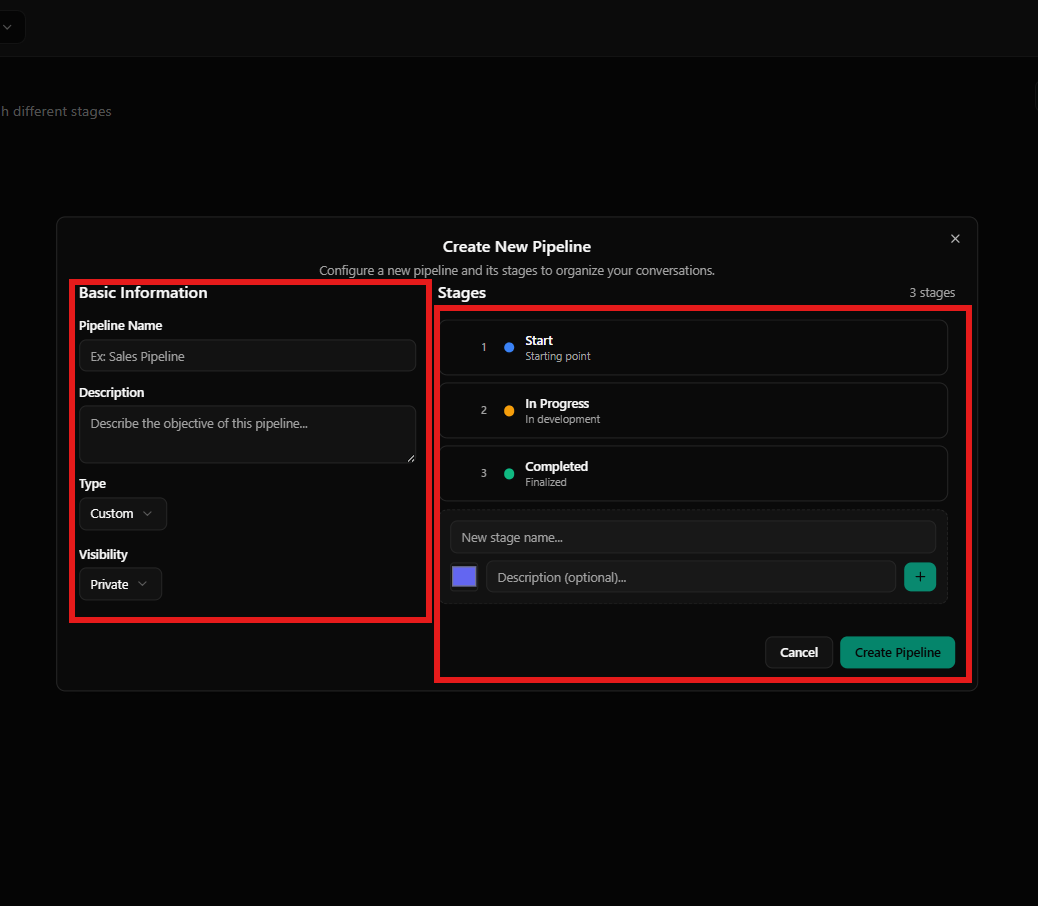
-
Pipeline Name
Name of the pipeline that will be displayed in the listing. -
Description
Optional description to identify the pipeline’s purpose. -
Type
Pipeline type, used for internal categorization. -
Visibility
Defines whether the pipeline will be public or private.
Configuring Stages
Still on the creation screen, you can configure the pipeline stages.- Stages represent the phases of the flow.
- You can add new stages by providing:
- Stage name
- Description (optional)
- The order of stages defines the conversation flow.
Pipeline Created
After creation, the pipeline will be displayed in the list.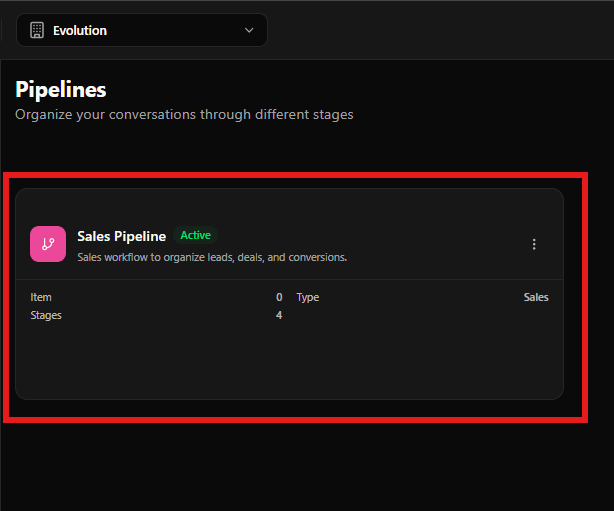
- Pipeline Name
- Status (Active or Inactive)
- Items
Number of conversations associated with the pipeline. - Stages
Total number of configured stages. - Type
Type defined during creation.
Pipeline Actions
Each pipeline has an actions menu accessible through the three dots icon.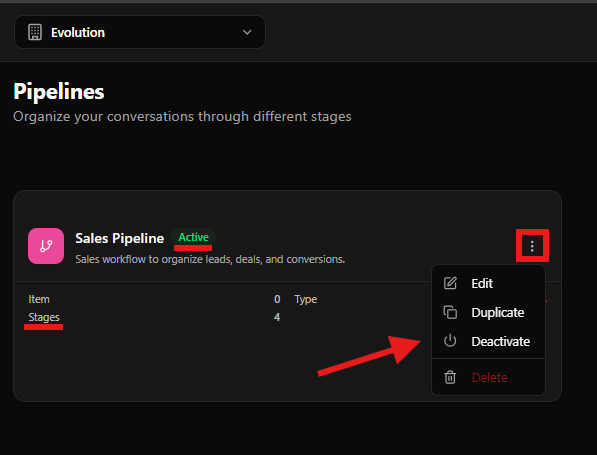
-
Edit
Allows editing all pipeline settings, including name, description, type, visibility, and stages. -
Duplicate
Creates a copy of the pipeline with the same stage structure. -
Deactivate
Deactivates the pipeline, preventing its use without removing it from the system. -
Delete
Permanently removes the pipeline.
Accessing the Pipeline
When you click on a pipeline, you access its complete view in Kanban format.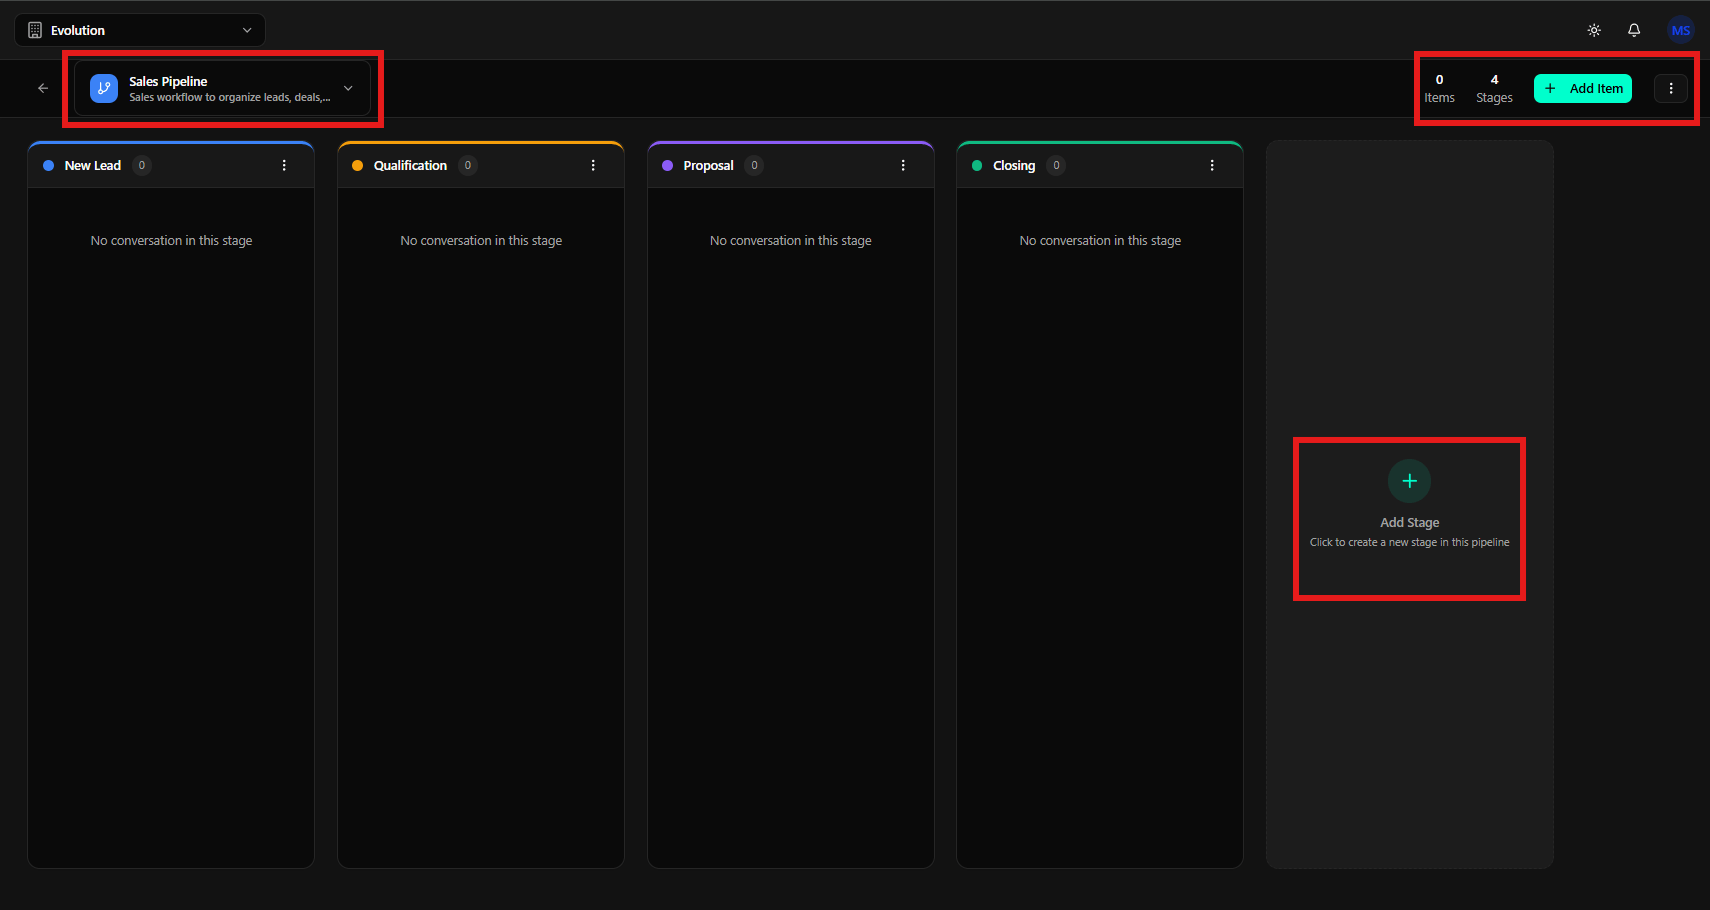
Kanban View
The Kanban view presents the pipeline as a column board, where each column represents a stage of the process. This interface allows you to visualize and manage the conversation flow visually and intuitively.Pipeline Header
At the top of the view, you find:- Pipeline Name: Displayed in a dropdown in the upper left corner, along with the pipeline description
- Metrics: In the upper right corner, the following are displayed:
- Items: Total number of conversations associated with the pipeline
- Stages: Total number of configured stages
- ”+ Add Item” Button: Allows adding new conversations directly to the pipeline
Stage Columns
Each stage is represented by a vertical column on the Kanban board:- Stage Name: Displayed at the top of each column
- Color Indicator: A colored dot visually identifies each stage
- Counter: Shows how many conversations are in each stage
- Content Area: Displays conversations associated with the stage or the message “No conversation in this stage” when empty
Adding New Stages
To the right of the last stage, there is a highlighted “Add Stage” button:- Icon: Green circle with addition sign (+)
- Function: Allows creating new stages directly in the Kanban view
- Usage: Click the button to add a new phase to the pipeline without leaving the view
Available Features
In this view, you can:- View all stages side by side: Track the complete progress of the flow
- Move conversations between stages: Drag and drop conversations to move them between columns
- Add new stages: Use the “Add Stage” button to expand the pipeline
- Add new items: Use the ”+ Add Item” button to include conversations in the pipeline
- Track metrics: View how many conversations are in each stage
Final Considerations
Pipeline management allows structuring support flows visually and organized. With well-defined pipelines, it’s possible to:- Track progress: Visualize where each conversation is in the process through the Kanban board
- Standardize processes: Define clear stages that reflect your real workflow
- Improve efficiency: Identify bottlenecks and optimization opportunities by observing the distribution of conversations between stages
- Organize teams: Assign responsibilities by stage and track the performance of each phase
- Automate movements: Configure rules to automatically move conversations between stages based on specific conditions
Stage Automation
Each pipeline stage can have automation rules configured in the Automation tab of the stage edit modal. Rules follow thetrigger → action model:
- Triggers:
label_added,conversation_status_changed,custom_attribute_updated. - Actions:
move_to_stage,assign_agent,apply_label, and (starting inv1.0.0-rc3)move_to_pipeline.
move_to_pipeline Action (rc3)
Lets you move the pipeline item to a different pipeline, preserving the item’s id. Useful for flows like “if qualified label was added in the Leads pipeline, move to the Sales pipeline”.
The action automatically bypasses the same-pipeline validation (which normally would prevent movement between distinct pipelines).
Guarantees
- 5s dedup window for
pipeline_stage_updatedper(rule, pipeline_item, stage)— prevents burst firing. - Loop prevention — a
move_to_stagerule does not recursively trigger another rule of the same type. - Centralized logs in
Settings → Automation → Logs— view executions, evaluated conditions, and errors.
Linking Products to Items (starting in v1.0.0-rc3)
Each pipeline item has a Sale panel where you can record which catalog product is being negotiated. Useful for per-product conversion reports. The AI agent can also do this binding automatically during a conversation, using the native toollink_product_to_pipeline_item. When the customer confirms interest, the agent records the link without manual intervention.
See Products Catalog.
Pipeline Actions in Card Menus (starting in v1.0.0-rc3)
Kanban cards now expose pipeline actions both via the three-dot menu (⋮) on the card and via right-click (context menu). Available actions include moving between stages, assigning agent, applying label, and opening the item detail.
Remember to review and adjust your pipelines regularly as your operation evolves, ensuring they continue to reflect your business processes efficiently.