

Creating a New Agent
You can create a new agent using one of the available New Agent buttons.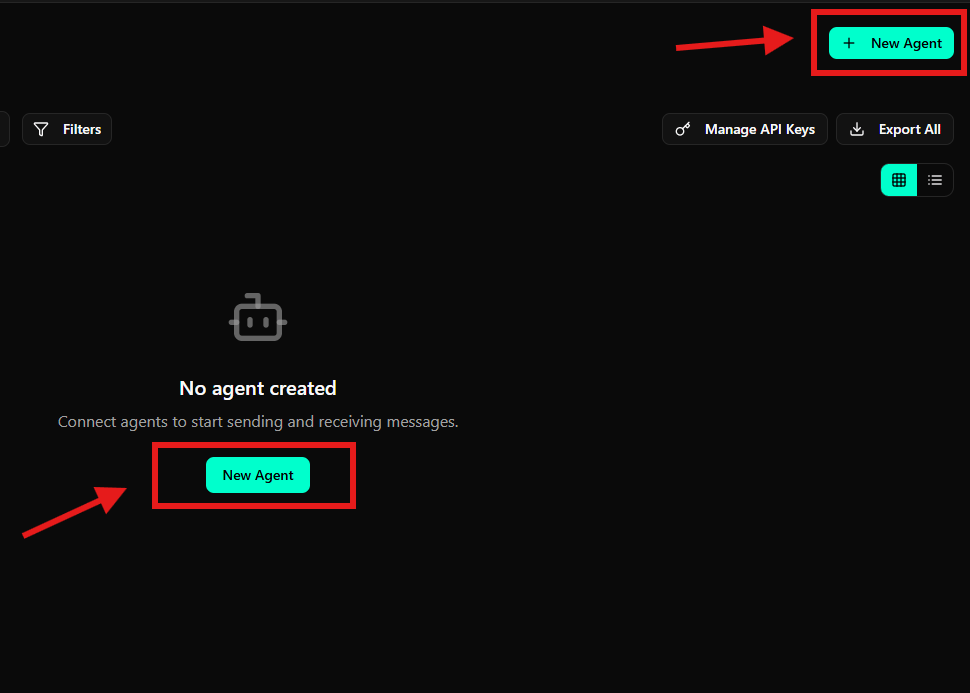
- In the upper right corner of the screen
- In the center of the empty state when no agent exists
Starting Agent Creation
To start creating an agent, access the Agents section and click New Agent. This will open the creation wizard, which guides the process in steps.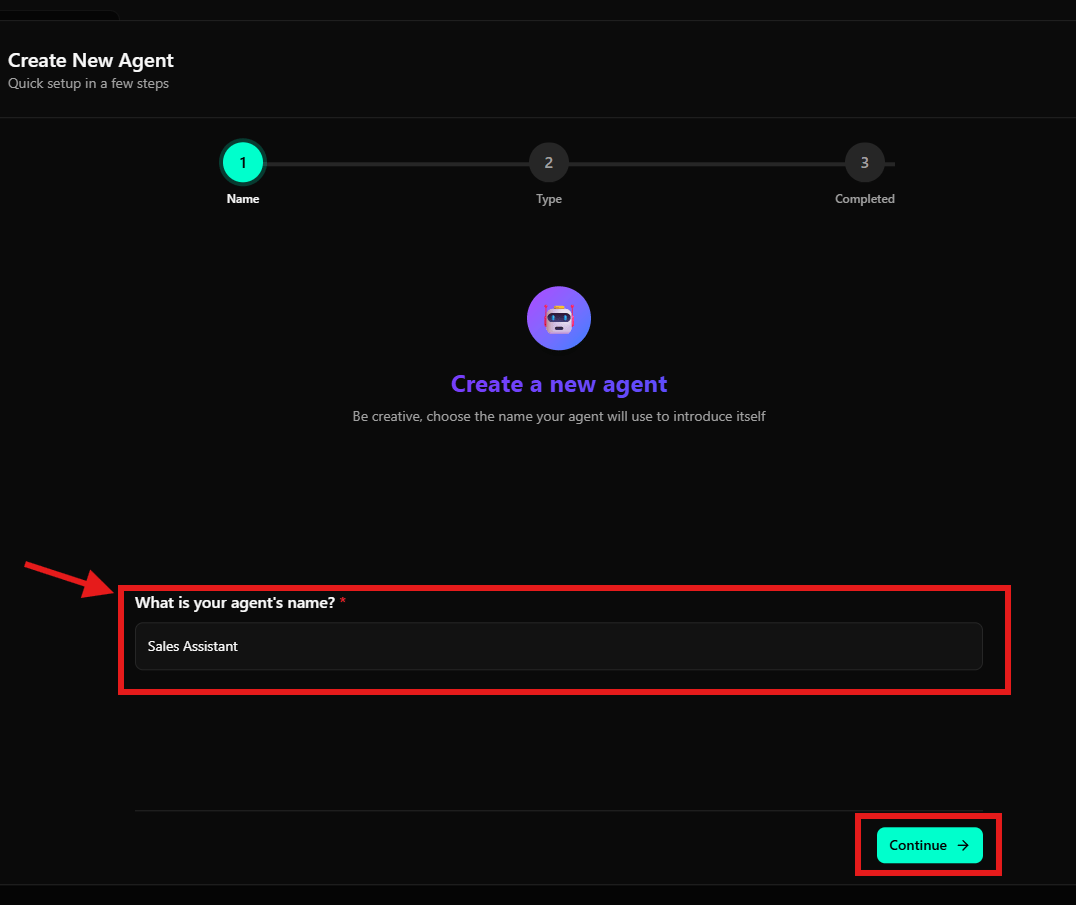
Agent name
The What is your agent’s name? field defines the name that will be used to identify the agent within the workspace.- The name is required
- It will be displayed in the agent list
- It can be changed later in advanced settings
Selecting the Agent Type
In the next step, you must choose the agent type that best fits your use case.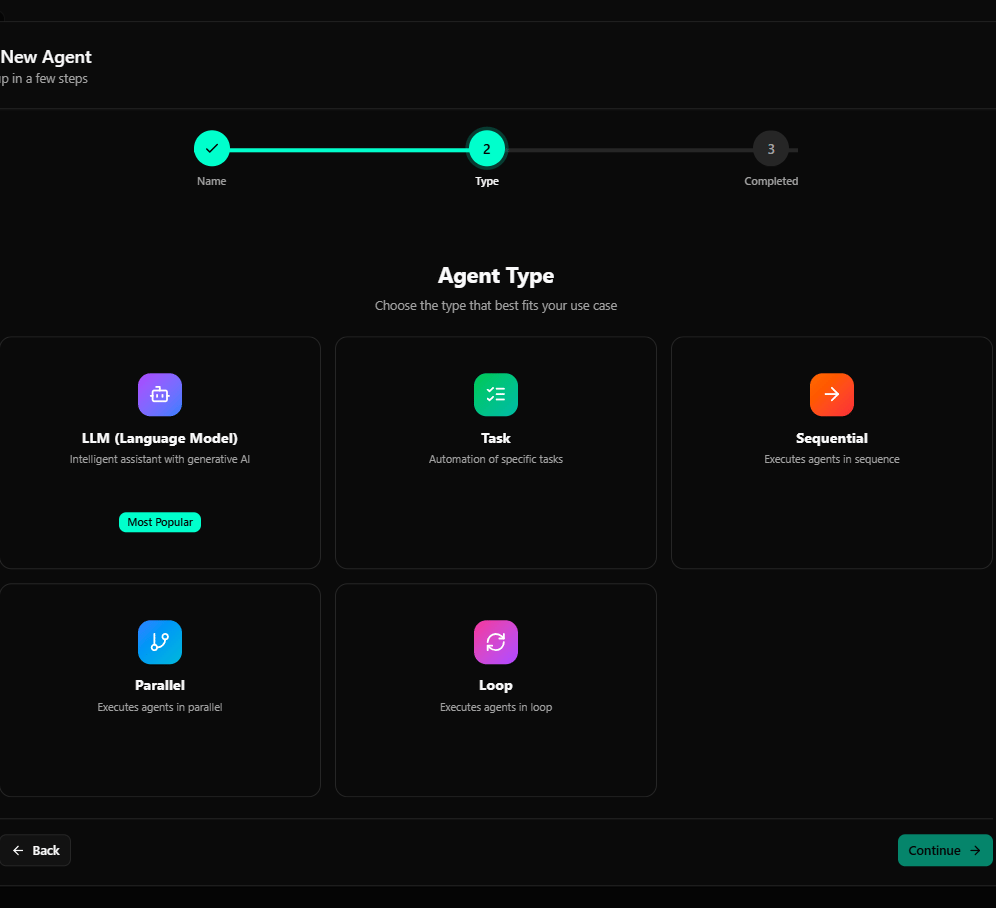
- LLM (Language Model): Conversational agent based on language models (most common)
- Task: Agent focused on automating specific tasks
- Sequential: Executes agents in sequence
- Parallel: Executes agents in parallel
- Loop: Executes agents in a continuous loop
LLM Agent Type
For conversational agents, select the LLM (Language Model) option.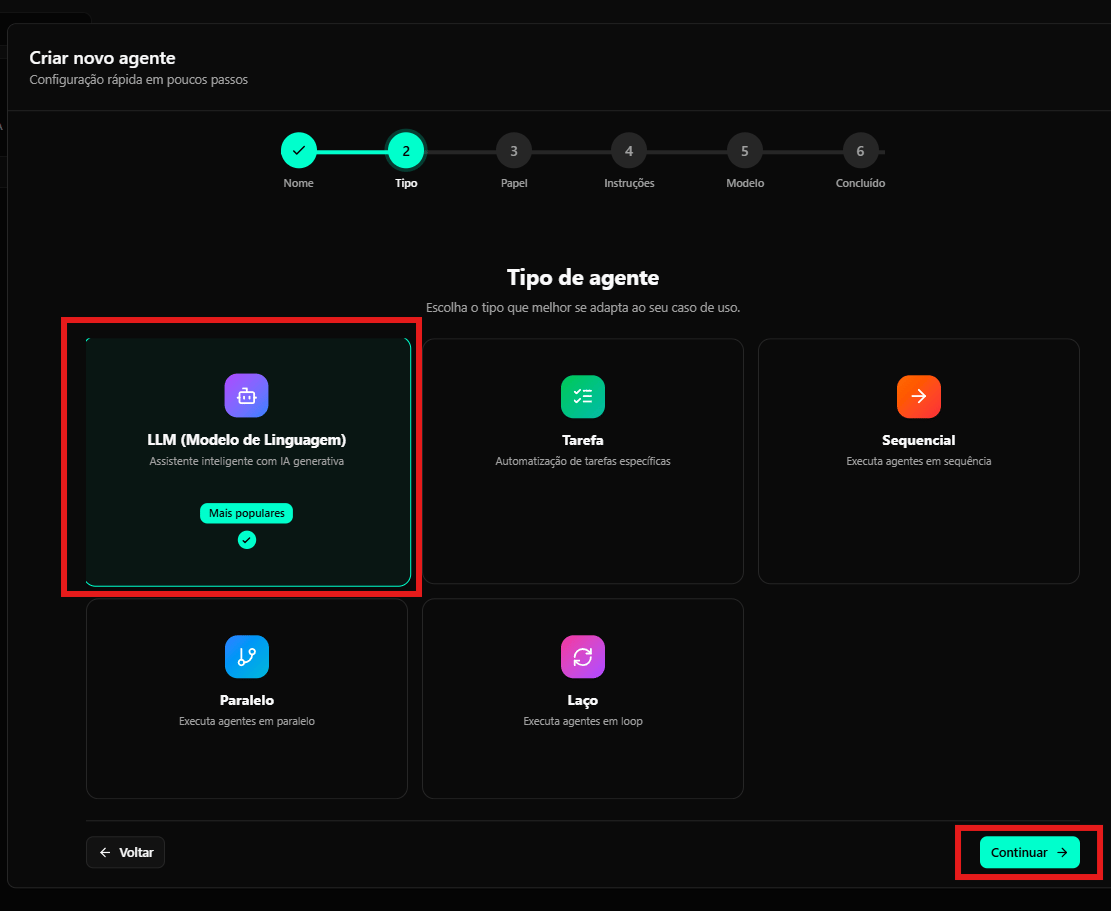
Defining Agent Role and Goal
In this step, you define the agent’s role and main objective.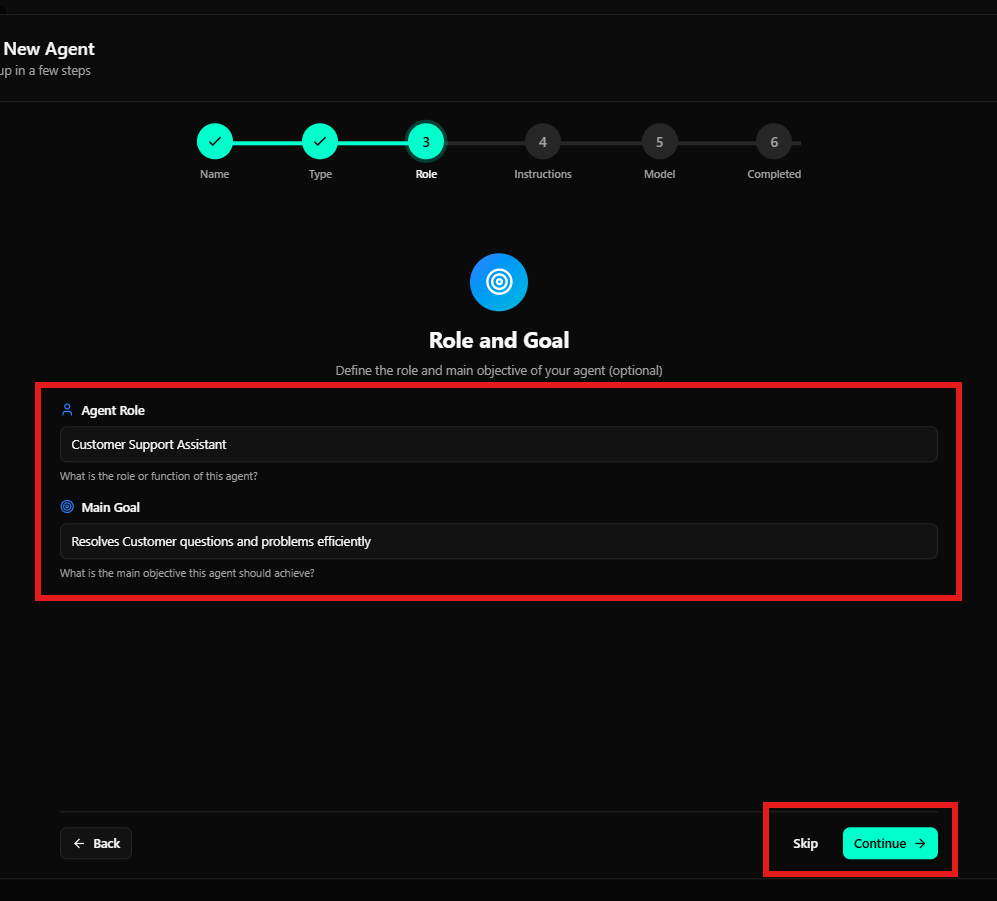
Agent Role
The Agent Role field describes the agent’s function, that is, what role it plays (for example: support assistant, salesperson, analyst).Main Goal
The Main Goal field defines the agent’s main objective, describing what it should achieve during interactions. These fields help guide the agent’s behavior, but can be adjusted later. This step is optional and can be skipped by clicking Skip.Defining Agent Instructions
The instructions step defines how the agent should behave and respond.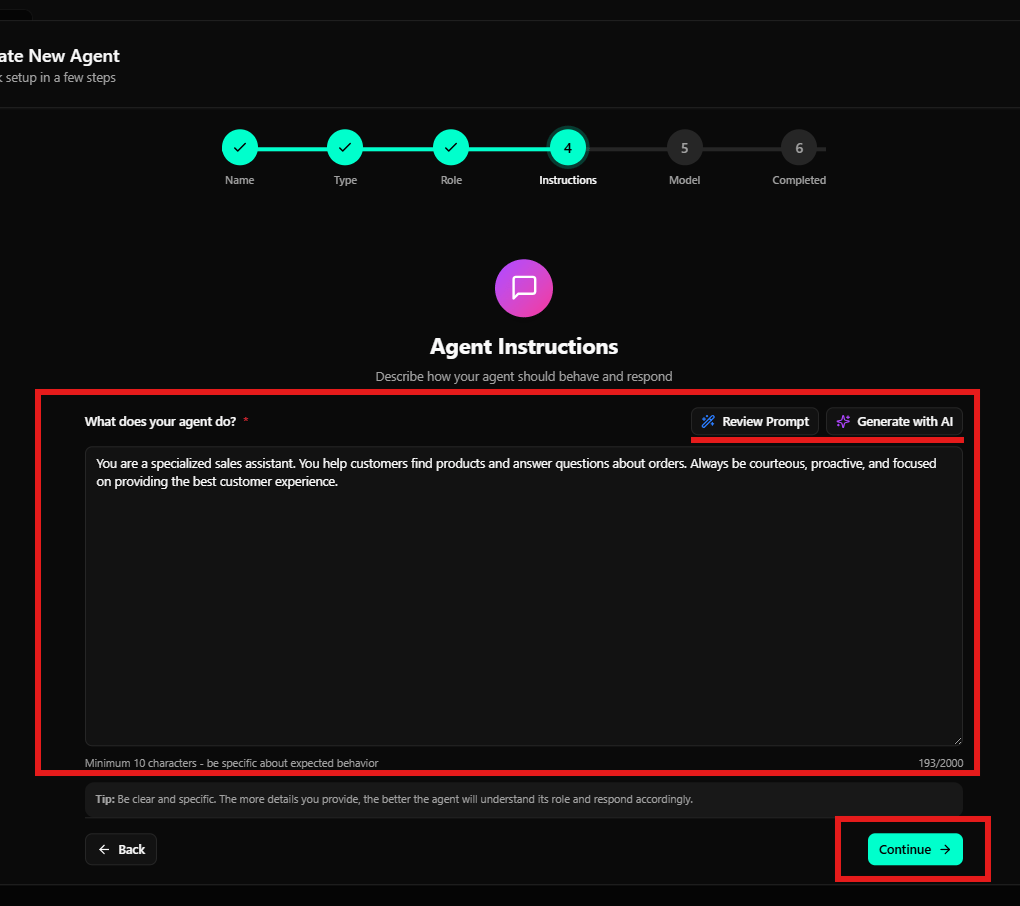
- The expected behavior of the agent
- The response tone (formal, friendly, technical, etc.)
- Limits and responsibilities
- Best practices for service or execution
You can use the Review Prompt or Generate with AI buttons to review or automatically generate suggestions.
Selecting the AI Model
In this step, you define which AI model will be used by the agent.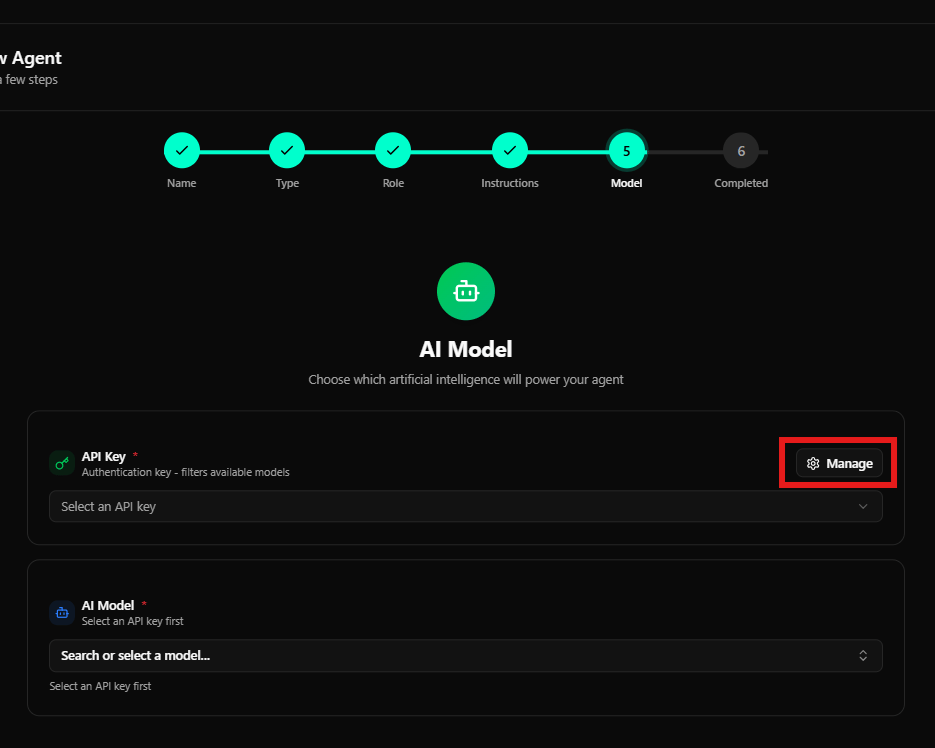
Managing API Keys
Click Manage to open the API key manager.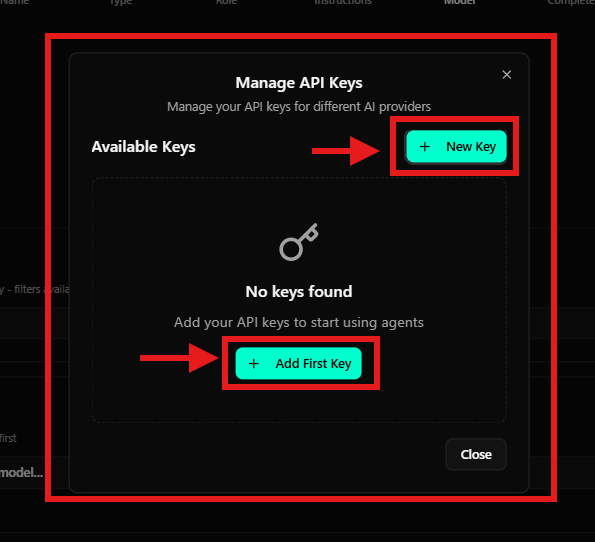
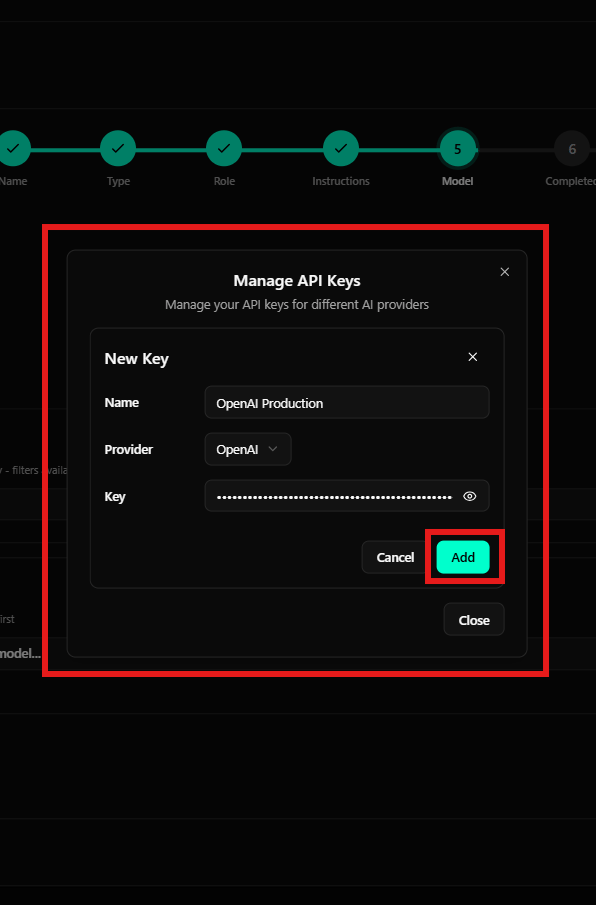
- Name: Identifier name for the key
- Provider: Model provider (e.g., OpenAI)
- Key: API key provided by the provider
Choosing the AI Model
After configuring the API Key, you will be able to select the AI model.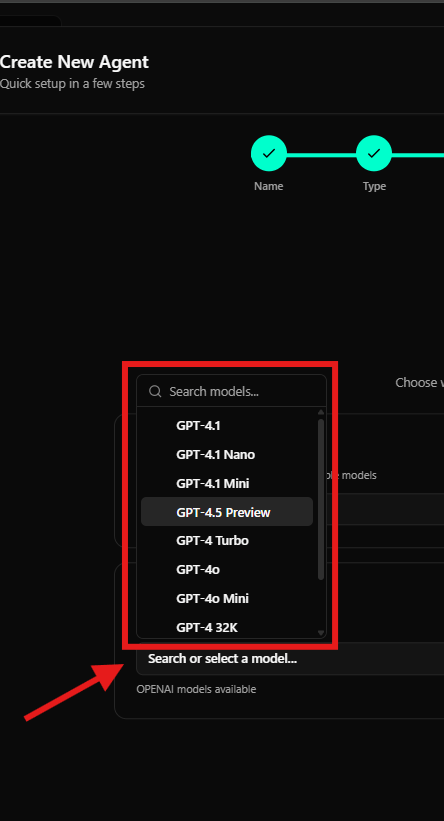
Agent Created Successfully
After completing all steps, the agent will be created and ready for use.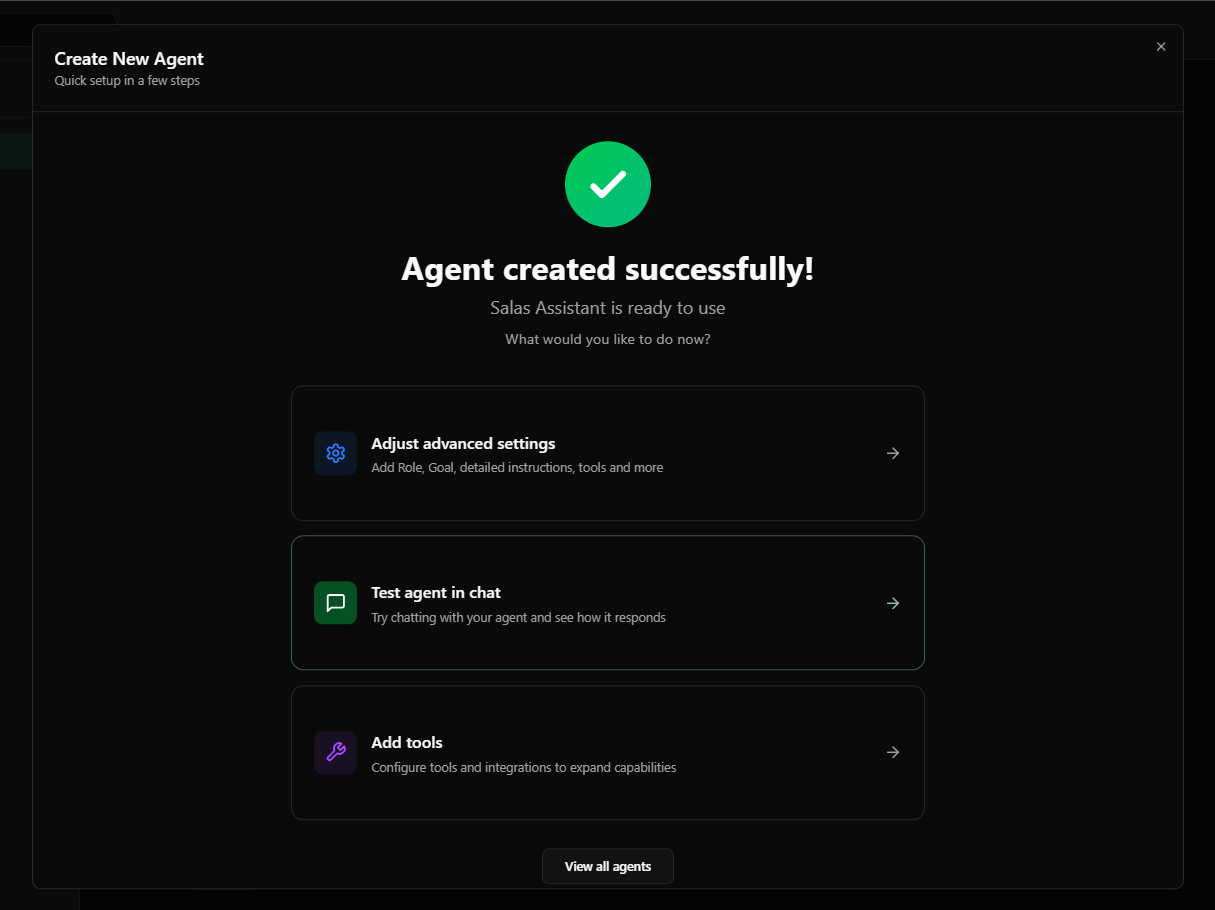
- Adjust advanced settings
- Test the agent in a chat
- Add tools
- Return to the agent list