

- Automatic reminders
- Scheduled follow-ups
- Scheduled messages for specific contacts
Accessing Scheduled Actions
To access the Scheduled Actions screen, follow the steps below:- In the sidebar menu, click Contacts
- Then, select Scheduled Actions
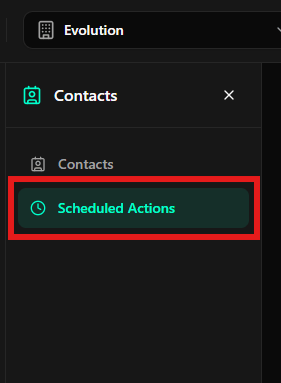
Scheduled Actions Initial Screen
When accessing the screen, you will see an overview with all existing scheduled actions. When no action has been created, the interface will display a message indicating that there are no scheduled actions.Screen components:
- Search field: allows searching scheduled actions by contact name.
- “New Action” button: available in the upper right corner and also in the center of the screen when there are no records.
Creating a New Scheduled Action
To create a new scheduled action, click the New Action button.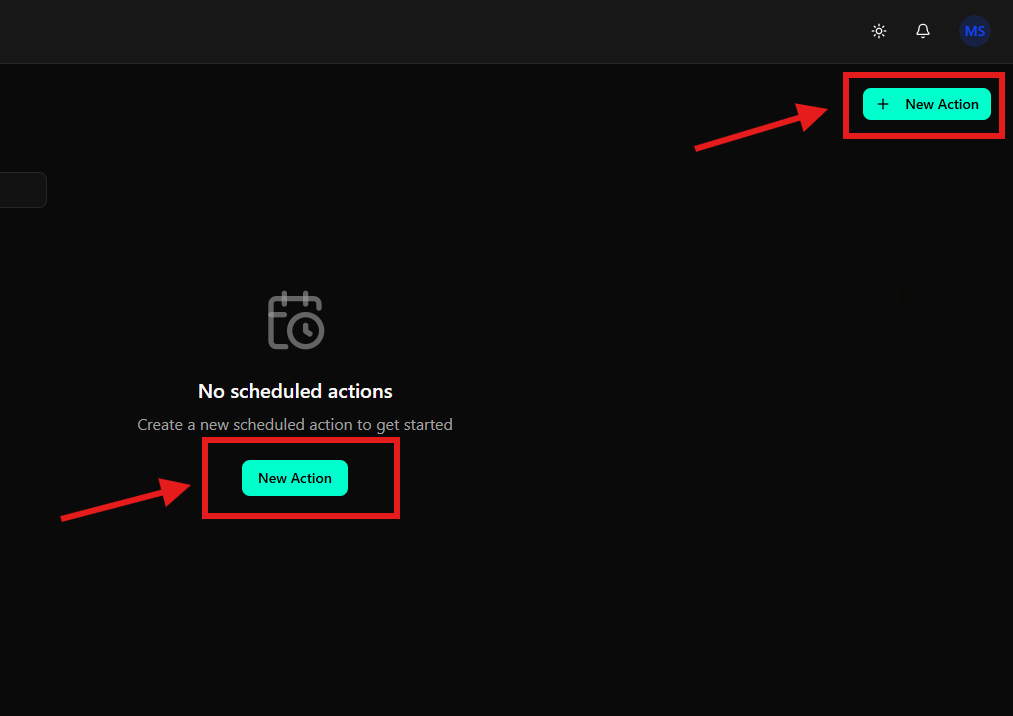
Selecting the Contact
In the New Scheduled Action modal, the first field is Contact.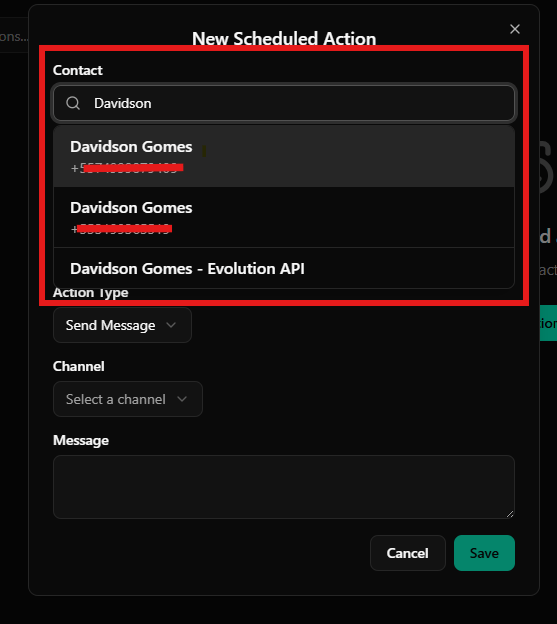
Field details:
- Type the contact name in the search field
- The list will display matching contacts
- Select the desired contact to associate it with the action
Only one contact can be selected per Scheduled Action.
Configuring Date, Time and Recurrence
After selecting the contact, fill in the scheduling information.Available fields:
Date and Time
- Defines the date and time when the action will be executed
- The format follows the pattern
dd/mm/yyyy hh:mm
Recurrence
- Defines the frequency of the action
- Currently available:
- Once: executes the action only once
Defining the Action Type
In the Action Type field, select the type of action that will be executed.Available option:
- Send Message: sends an automatic message to the selected contact
Selecting the Channel
In the Channel field, choose which channel the message will be sent through.Channel examples:
- Telegram
- WhatsApp (if configured)
- Other channels integrated into the platform
Only previously configured channels will be available for selection.
Writing the Message
In the Message field, write the content that will be sent to the contact at the scheduled time.Tips:
- The message will be sent exactly as written
- Review the text before saving the action
Saving the Scheduled Action
After filling in all fields correctly, click Save to finalize the action creation.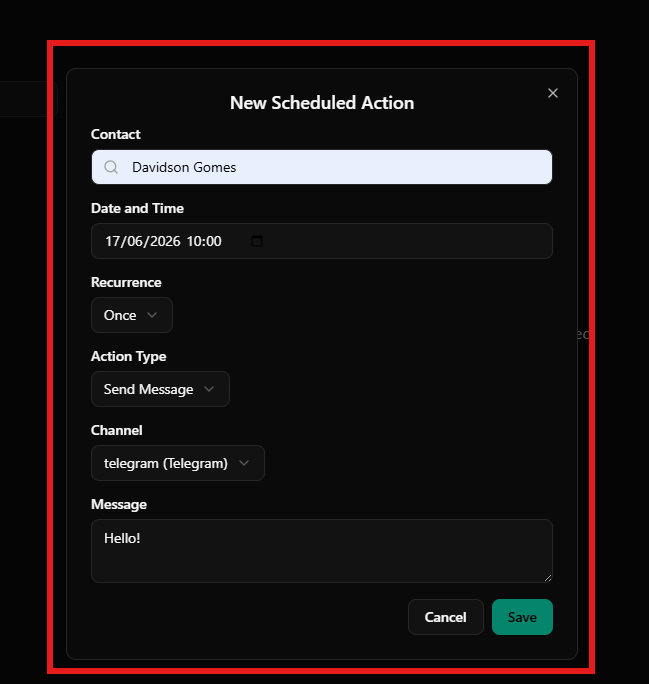
Final Considerations
- Each Scheduled Action is linked to a single contact
- The action will be automatically executed on the configured date and time
- You can view and manage all actions from the main Scheduled Actions screen