

Accessing the Knowledge Section
Use the main navigation menu to access the Knowledge area. In the sidebar, click Knowledge to open the knowledge management screen.Knowledge Main Screen
After accessing the Knowledge section, you will see the main screen listing all available documents and data sources.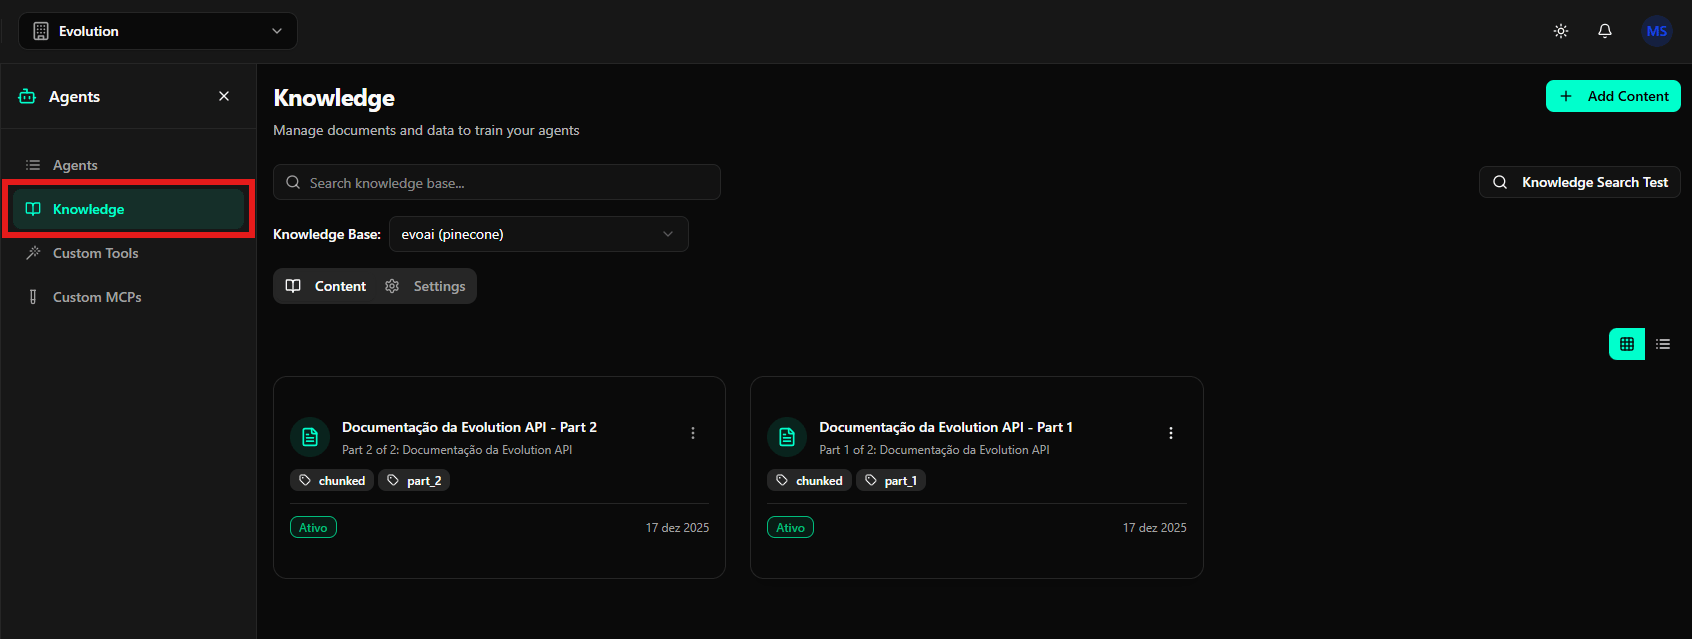
Editing an Existing Knowledge Entry
You can edit an existing document to update its title, description, or content. Click the three-dot menu on the document card and select the edit option to open the edit modal.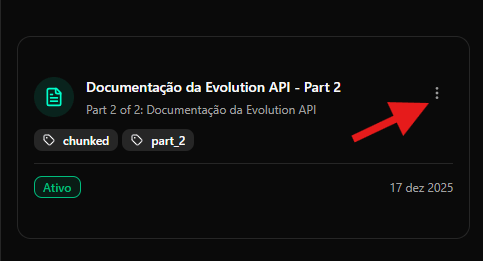
Adding New Content to the Knowledge Base
To add new content, use the Add Content button available on the Knowledge screen. Click Add Content to open the content creation modal. The modal offers three different methods for adding knowledge: Manual, Upload, and URL.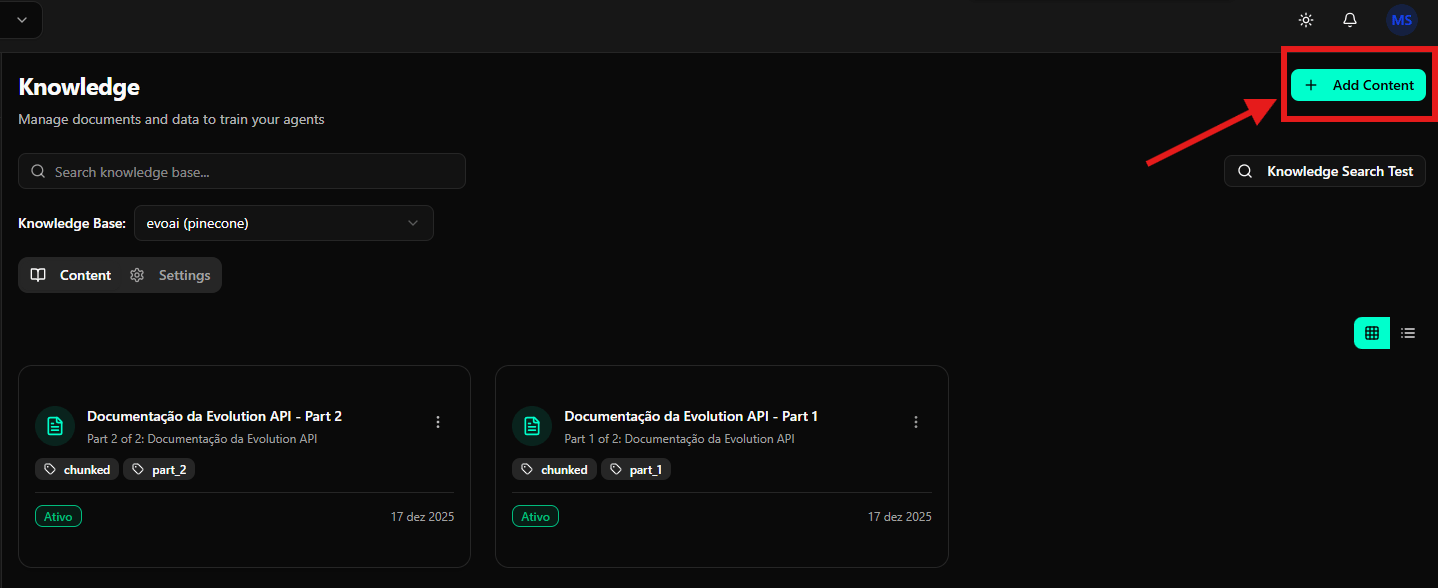
Adding Content Manually
You can create knowledge entries by typing content directly into the editor. Step by step:- Click Add Content on the Knowledge screen
- In the modal that opens, select the Manual tab
- Fill in the available fields:
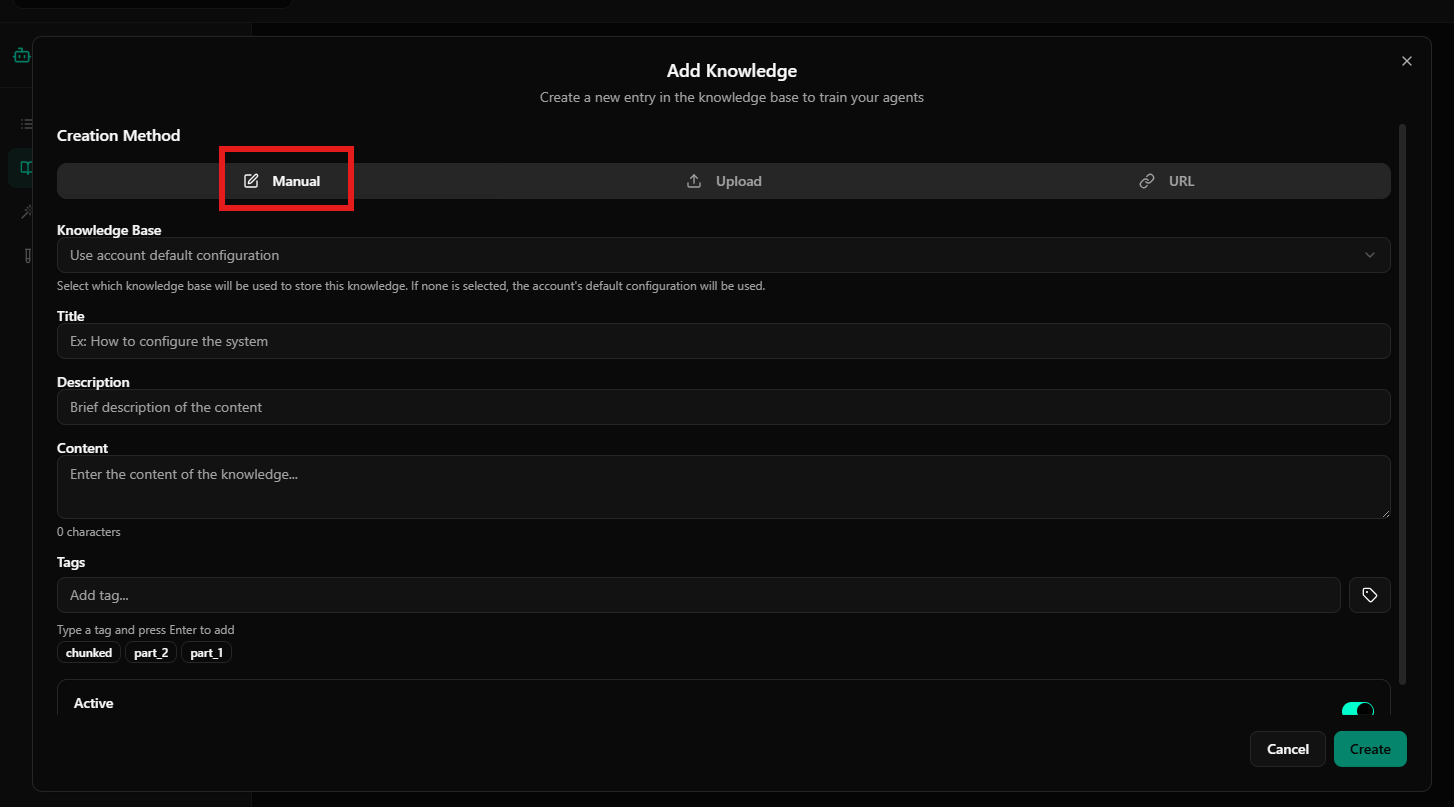
- Knowledge Base: Select which knowledge base will be used. If none is selected, the account’s default configuration will be used
- Title: Title of the knowledge entry (e.g., “How to configure the system”)
- Description: Brief description of the content
- Content: Complete content in text format. You can use Markdown for formatting
- Tags: Tags for categorization and filtering. Type a tag and press Enter to add
- Active: Toggle to activate or deactivate the entry
- After filling in all fields, click Create to save the entry
Adding Content via File Upload
You can upload documents directly from your computer. Step by step:- Click Add Content on the Knowledge screen
- In the modal that opens, select the Upload tab
- Drag and drop a file into the indicated area or click Choose File to select a file
- The file will be processed and indexed automatically
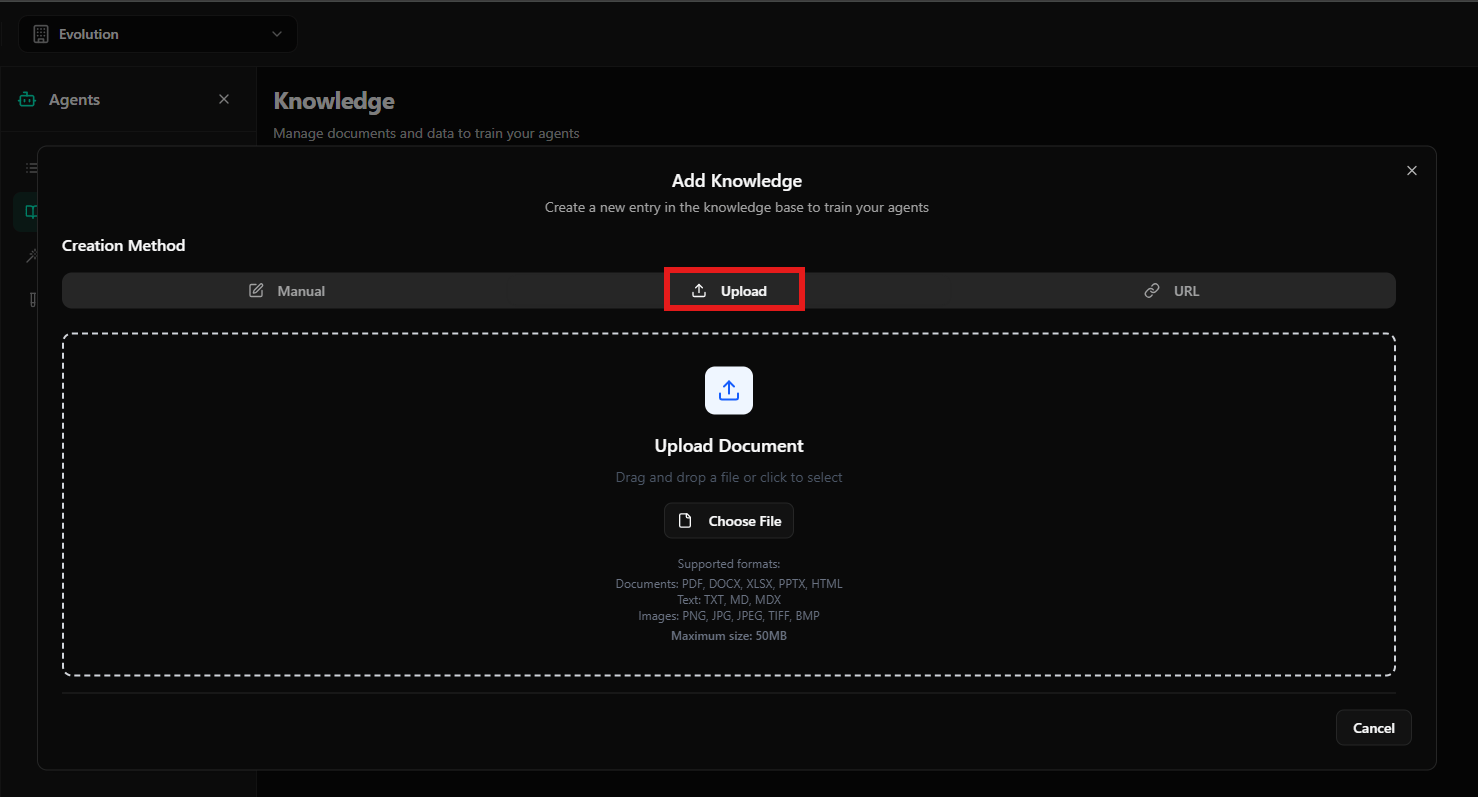
- Documents: PDF, DOCX, XLSX, PPTX, HTML
- Text: TXT, MD, MDX
- Images: PNG, JPG, JPEG, TIFF, BMP
Adding Content via URL
You can also index content from a public URL. Step by step:- Click Add Content on the Knowledge screen
- In the modal that opens, select the URL tab
- Paste the URL of the page or online document in the indicated field
- Configure the available options:
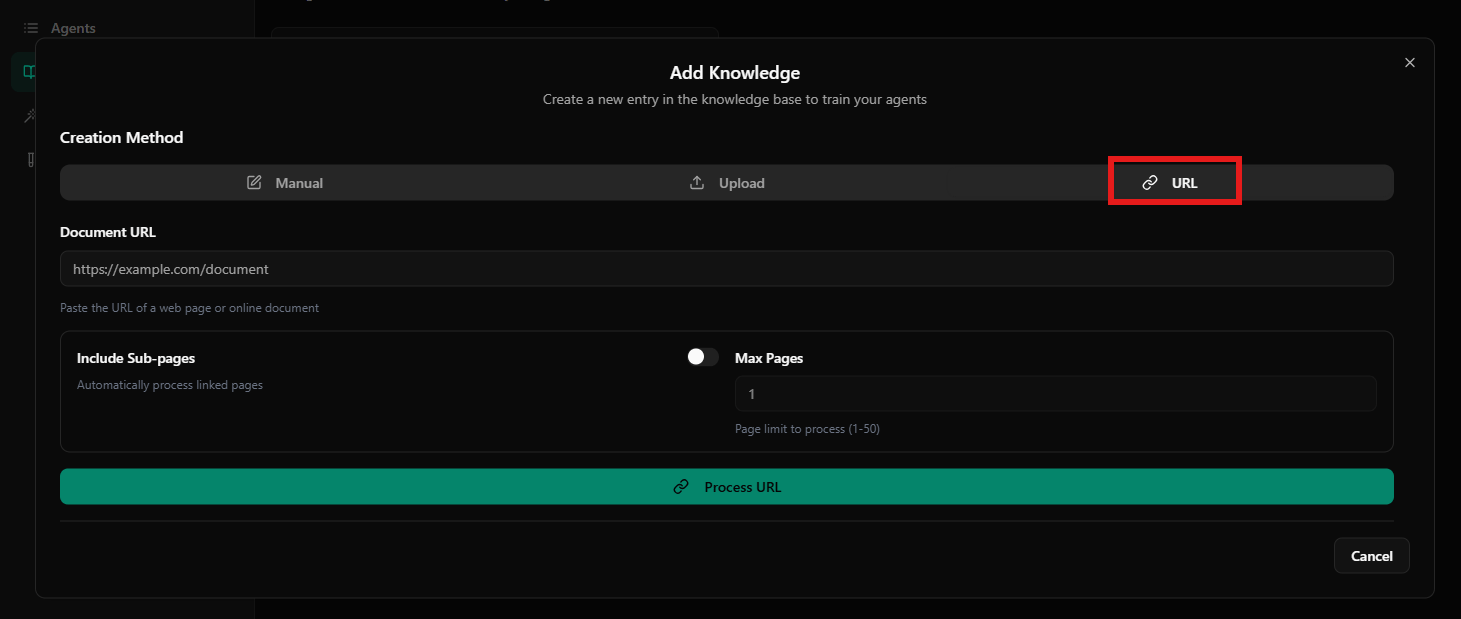
- Include Sub-pages: When enabled, automatically processes linked pages
- Max Pages: Page limit to process (1-50). Useful for controlling how many pages will be indexed
- Click Process URL to start processing and add the content to the knowledge base
Testing Knowledge Search
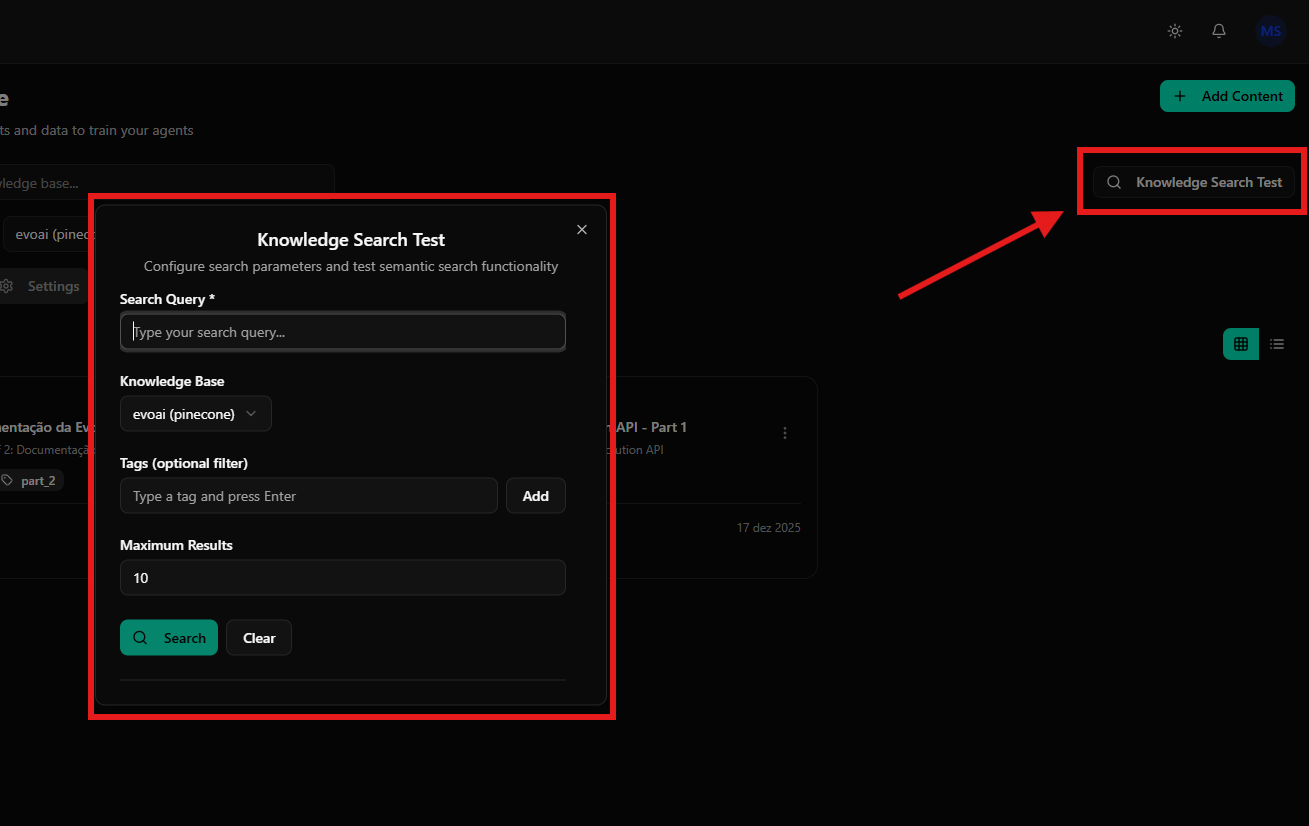
After adding content, you can test how the agent will retrieve information. Use this functionality to validate semantic search results based on queries and tags. Test settings:- Search Query: Search query to test
- Knowledge Base: Select which knowledge base to use
- Tags: Optional tag filter
- Maximum Results: Maximum number of results returned
Knowledge Base Settings
You can configure providers and indexing settings for the knowledge base. On this screen, you can manage providers such as Pinecone or Qdrant and control activation.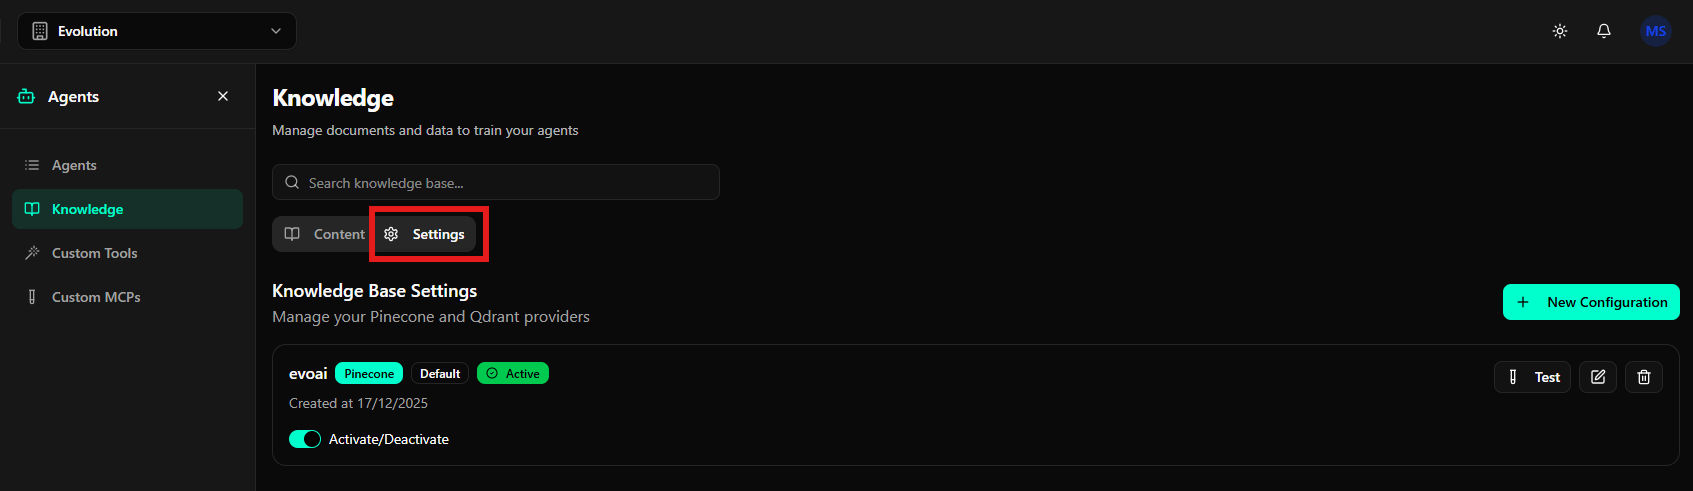
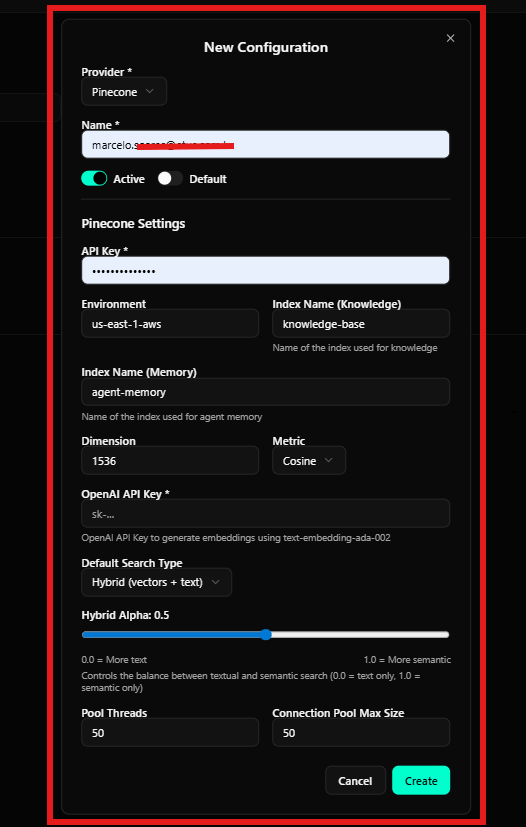
Creating a New Knowledge Configuration
You can create a new provider configuration for the knowledge base. Available settings:- Provider: Select the provider (Pinecone, Qdrant, etc.)
- Name: Configuration name
- Active: Toggle to activate/deactivate
- Default: Set as default configuration
- API Key: Pinecone API key
- Environment: Pinecone environment (e.g., us-east-1-aws)
- Index Name (Knowledge): Index name used for knowledge
- Index Name (Memory): Index name used for agent memory
- Dimension: Vector dimension (e.g., 1536)
- Metric: Search metric (Cosine, Euclidean, DotProduct)
- Default Search Type: Default search type (Hybrid, Vector, Text)
- Hybrid Alpha: Control of the balance between textual and semantic search (0.0 = text only, 1.0 = semantic only)
- Pool Threads: Number of pool threads
- Connection Pool Max Size: Maximum connection pool size
Final Considerations
The Knowledge Base is essential for allowing agents to answer questions based on your documents and data. Always ensure that content is properly indexed and tested before using it in production agents. Important tips:- Always test semantic search after adding new content
- Use tags to organize and filter knowledge
- Properly configure providers for better performance
- Keep content updated and relevant
- Use the test functionality before activating agents in production
Alternative: Knowledge Nexus (starting in v1.0.0-rc3)
For teams that maintain a knowledge base separate from the CRM (wiki, living docs, content evolving continuously), starting inv1.0.0-rc3 it is possible to link Knowledge Nexus spaces to the agent. The integration is complementary to the built-in Knowledge Base — you can use both in the same agent.
When to use Nexus instead of (or alongside) the CRM KB:
- Your organization already keeps a centralized base.
- Content evolves frequently.
- Multiple teams consume the same base.