

Starting a New Channel
To start creating an API channel, use the highlighted action on the Channels screen.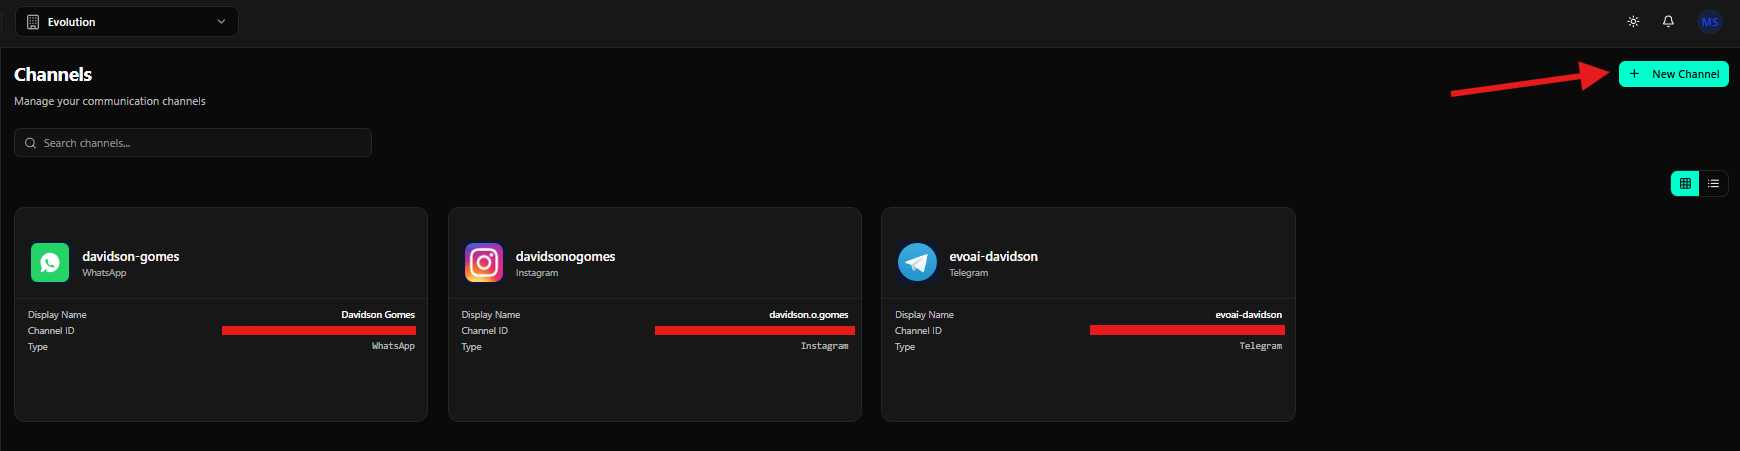
Selecting API
On the Select a channel type screen, click the API card.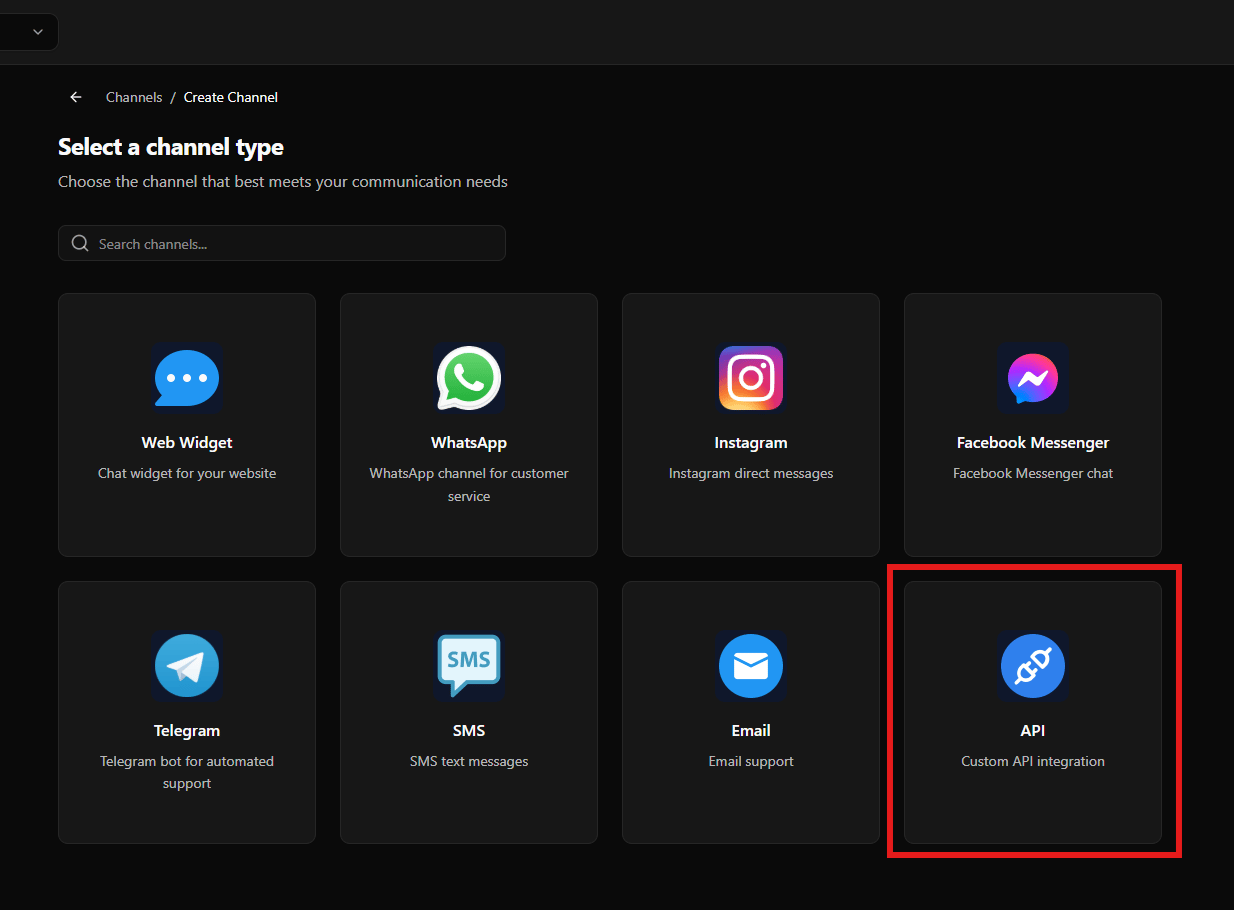
Configuring the API Channel
After selecting API, the Configure Channel screen is displayed.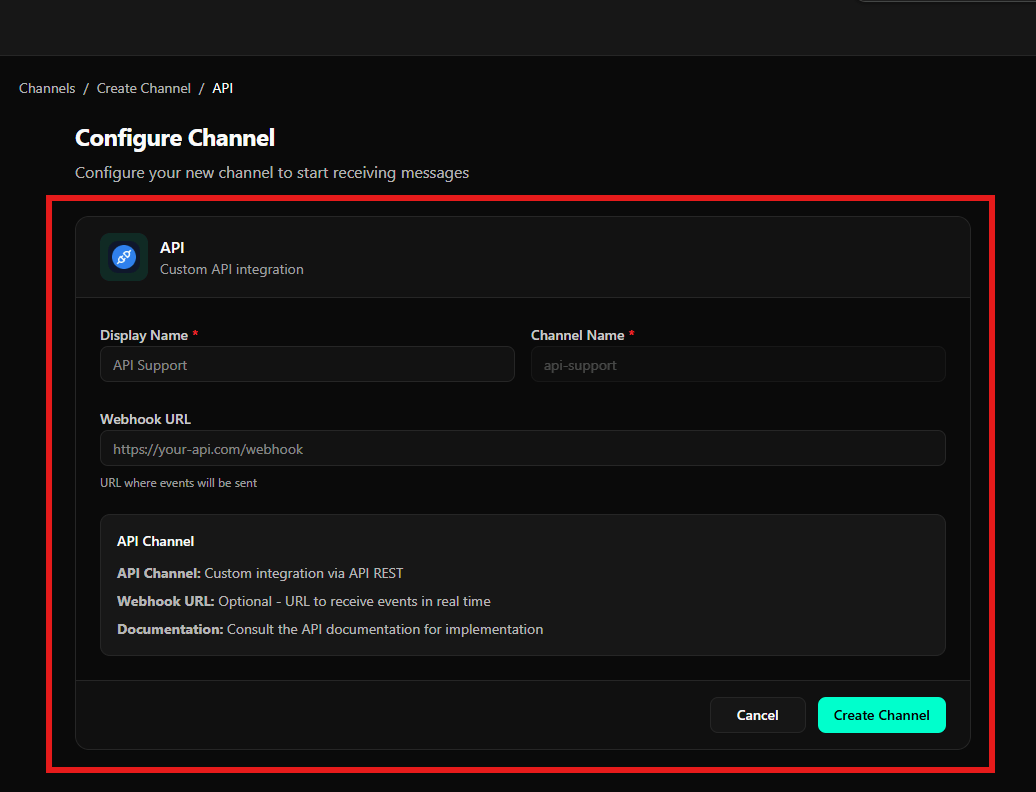
Channel Identification
- API
- Description: “Custom API integration”
Channel Information
- Display Name *
- Friendly name for identification
- Example: “API Support”
- Channel Name *
- Channel name (automatically generated)
- Example: “api-support”
Webhook Configuration
- Webhook URL
- URL where events will be sent
- Example: “https://your-api.com/webhook”
- Optional field
API Channel Information
The screen displays an information box with:- API Channel: Custom integration via REST API
- Webhook URL: Optional - URL to receive real-time events
- Documentation: Consult the API documentation for implementation
Action Buttons
- Cancel
- Discards the configuration
- Create Channel
- Saves and activates the API Channel
Final Considerations
- The API channel requires technical knowledge for configuration
- The Webhook URL is optional but recommended for receiving real-time events
- API credentials must be kept secure
- Consult the API documentation for implementation details
- Once configured, the channel allows integration with external systems through REST endpoints