

Starting a New Channel
To start creating a Website Widget channel, use the highlighted action. The New Channel button (highlighted) starts the channel creation flow.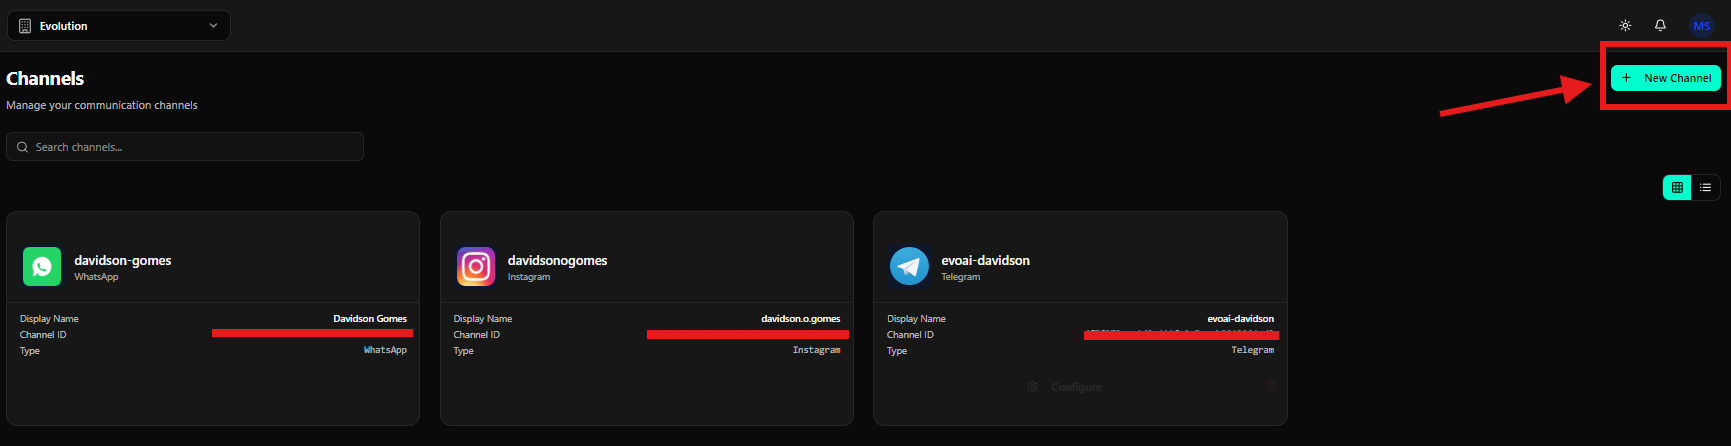
Selecting Website Widget
On the Select a channel type screen, click the Web Widget card.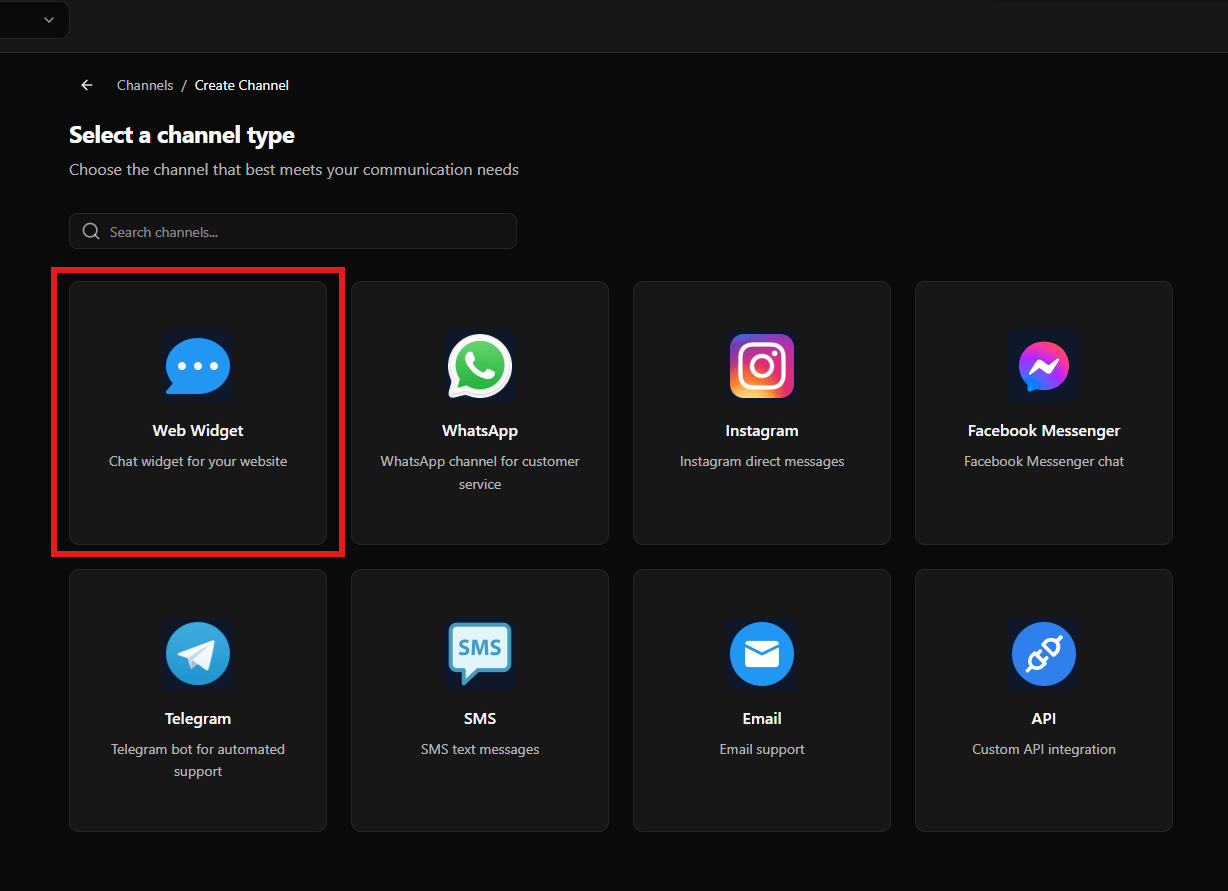
Configuring the Website Widget
After selecting Web Widget, the configuration screen is displayed.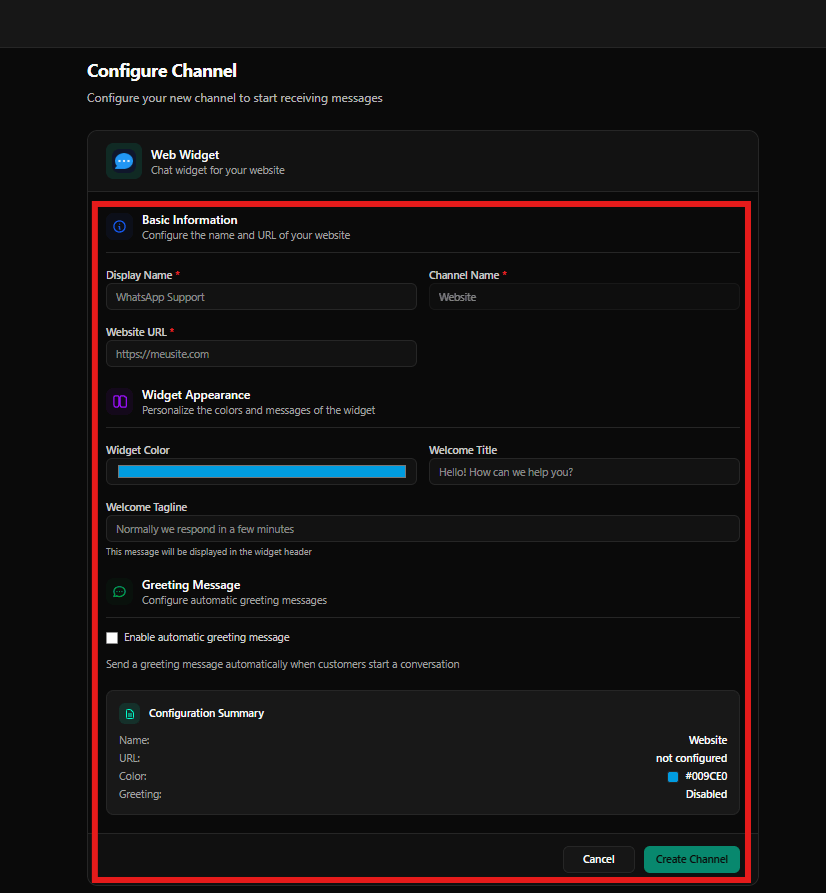
Basic Information
- Display Name
- Name displayed internally to identify the channel
- Channel Name
- Internal widget identifier
- Website URL
- URL where the widget will be embedded
Widget Appearance
- Widget Color
- Defines the widget’s main color
- Welcome Title
- Main message displayed at the top of the widget
- Welcome Tagline
- Short message displayed below the title
Welcome Message
- Enable automatic greeting message
- When enabled, automatically sends a welcome message when a visitor opens the chat
Configuration Summary
- Displays a summary of:
- Website name
- URL
- Selected color
- Welcome message status
Action Buttons
- Cancel
- Discards the configuration
- Create Channel
- Saves and activates the Website Widget
Final Considerations
- The Website Widget requires a valid Website URL
- Visual customization affects how the widget appears to visitors
- Once created, the widget is available for embedding on your site