

Accessing Macros
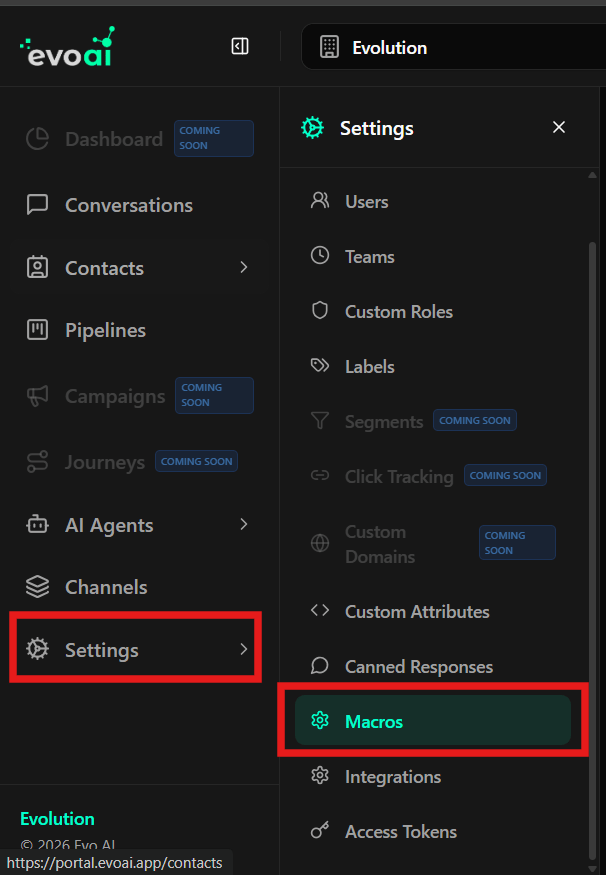
To access the macros management area:- In the left sidebar menu, click Settings.
- In the settings options list, select Macros.
Searching Macros
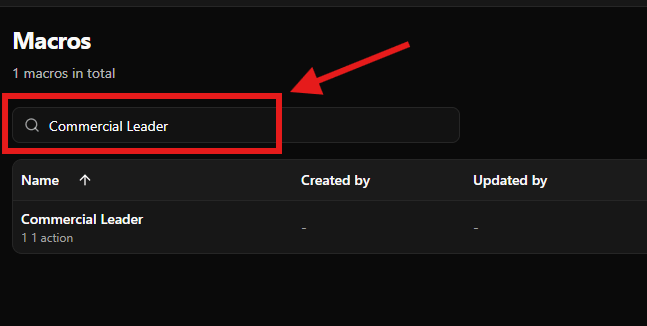
The search bar allows you to quickly locate macros by name.How to search
- At the top of the screen, locate the “Search macros…” field with the search icon
- Type the name or part of the name of the desired macro
- The macros table will be automatically updated as you type, showing only macros that match the search
Creating a New Macro
There are two ways to start creating a new macro:Option 1: Header Button
- Click the green ”+ New Macro” button located in the top right corner of the screen
Option 2: Empty State Button
When there are no macros created, click the green “New Macro” button in the center of the screen.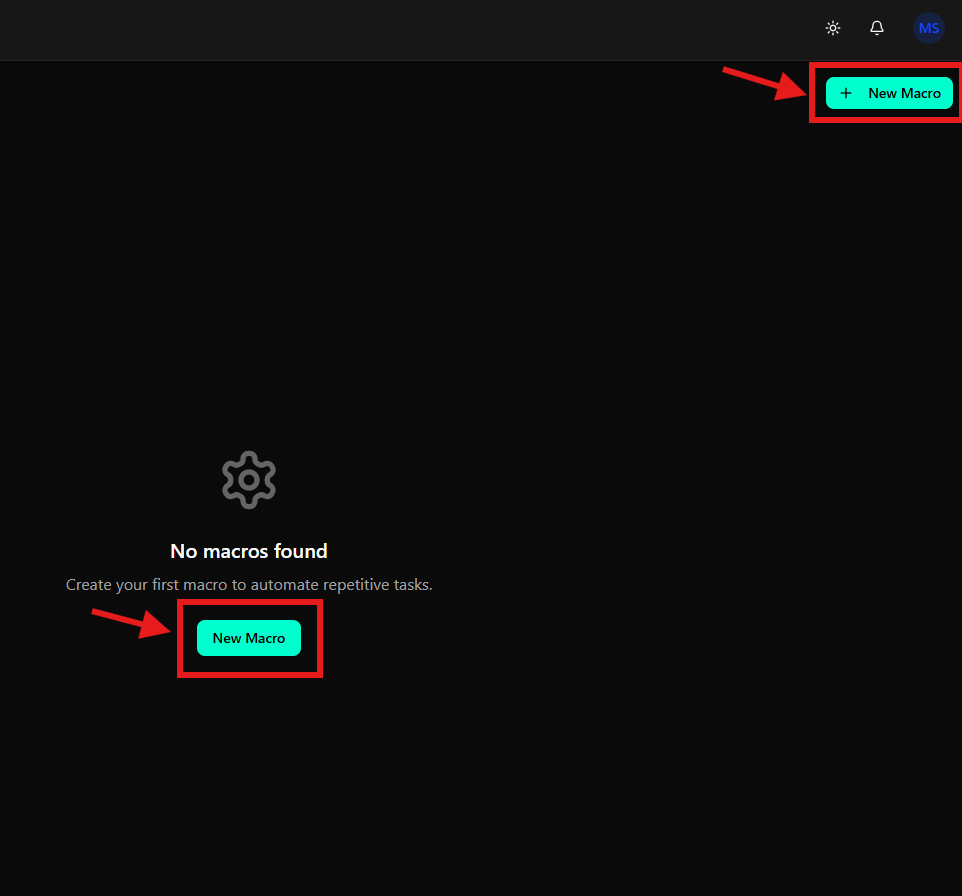
Filling Out the Creation Form
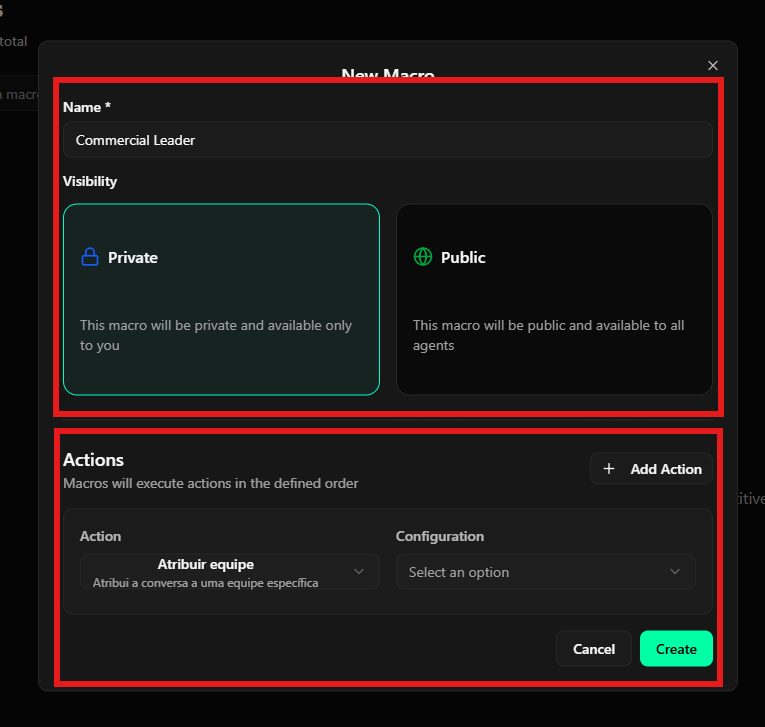
After clicking any of the buttons, a modal will be displayed with a dark background containing:- Title: “New Macro” at the top of the modal
- Close Button: An “X” icon in the top right corner to close the modal without saving
1. Name (Required)
- Field: Name (marked with asterisk
*indicating required field) - Type: Simple text field
- Description: Identifier name of the macro
- Example: “Commercial Leader”, “Assign Sales Team”, “Standard Response”
- Recommendation: Use descriptive names that clearly indicate the macro’s purpose
- Location: First field of the form
2. Visibility
- Field: Visibility
- Type: Option selection (radio buttons)
- Description: Defines who can use this macro
-
Available options:
Private:
- Icon: Lock icon
- Description: “This macro will be private and available only to you”
- Behavior: The macro will be visible and usable only by you
- Recommendation: Use for personal macros or specific to your work
- Icon: Globe icon
- Description: “This macro will be public and available to all agents”
- Behavior: The macro will be visible and usable by all agents in the system
- Recommendation: Use for macros that standardize team processes
- Selection: The selected option is highlighted with a green border
- Default: Private is selected by default
- Location: Second field of the form, below the Name field
3. Actions
- Field: Actions
- Type: Configurable actions list
- Description: Defines the sequence of actions that the macro will execute
- Explanatory Text: “Macros will execute actions in the defined order” - indicates that actions will be executed in the order they are defined
- Add Button: ”+ Add Action” located in the right corner of the section header, allows adding new actions to the macro
-
Action:
- Type: Dropdown/Select
- Description: Type of action to be executed
- Example: “Assign team”
- Help Text: Below the selection, an explanatory description of the selected action appears (e.g., “Assigns the conversation to a specific team”)
- Location: First field of each action
-
Configuration:
- Type: Dropdown/Select
- Description: Specific parameters for the selected action
- Placeholder: “Select an option” when no option has been selected
- Behavior: Available options depend on the selected action
- Example: If the action is “Assign team”, the configuration will allow selecting which team will be assigned
- Location: Second field of each action, next to the Action field
- Assign team: Assigns the conversation to a specific team
- Other actions may be available depending on system functionalities
- Click the ”+ Add Action” button to add a new action to the sequence
- Configure the action and its configuration
- Repeat the process to add as many actions as needed
- Actions will be executed in the order they appear in the list (top to bottom)
- Location: Third field of the form, below the Visibility section
Finalizing Creation
At the bottom of the modal, there are two action buttons:- Cancel: Dark gray button with white text, located on the left
- Create: Bright green/turquoise button with white text, located on the right
- Review the entered information, especially the name, visibility, and action sequence
- Make sure all actions have their configurations filled correctly
- Click the green “Create” button to create the macro
- Or click “Cancel” to close the modal without saving
- Alternatively, click the “X” icon in the top right corner to close without saving
Viewing Macros in the Table
After creating macros, they will be displayed in a table with the following columns:Table Columns
- Name: Macro name (sortable - indicated by up/down arrow)
- Displays the descriptive name of the macro (e.g., “Commercial Leader”)
- Below the name, displays the number of configured actions (e.g., “1 action”)
- Created by: Macro creator
- Displays the name of the user who created the macro or a dash (”-”) if no information is available
- Updated by: Last user who updated the macro
- Displays the name of the user who updated the macro or a dash (”-”) if no information is available
- Visibility: Macro visibility
- Displays a lock icon followed by “Private” in blue text for private macros
- Displays a globe icon followed by “Public” for public macros
- ID: Unique macro identifier (sortable - indicated by up/down arrow)
- Displays the macro UUID (e.g., “5d83859d-3d52-4a26-a14f-27c63c868be5”)
- Actions: Action menu to manage the macro
- Three vertical dots icon (
...) that opens a dropdown menu with options
- Three vertical dots icon (
Table Features
- Sorting: Click on the “Name” or “ID” column headers to sort the table in ascending or descending order
- Integrated Search: The search bar above the table filters results in real-time
- Action View: The number of configured actions is displayed below the macro name, facilitating quick identification of macro complexity
Viewing a Macro
To view the complete details of a macro:- In the macros table, locate the macro you want to view
- In the Actions column, click the three dots icon (
...) corresponding to the macro - A dropdown menu will be displayed with available options
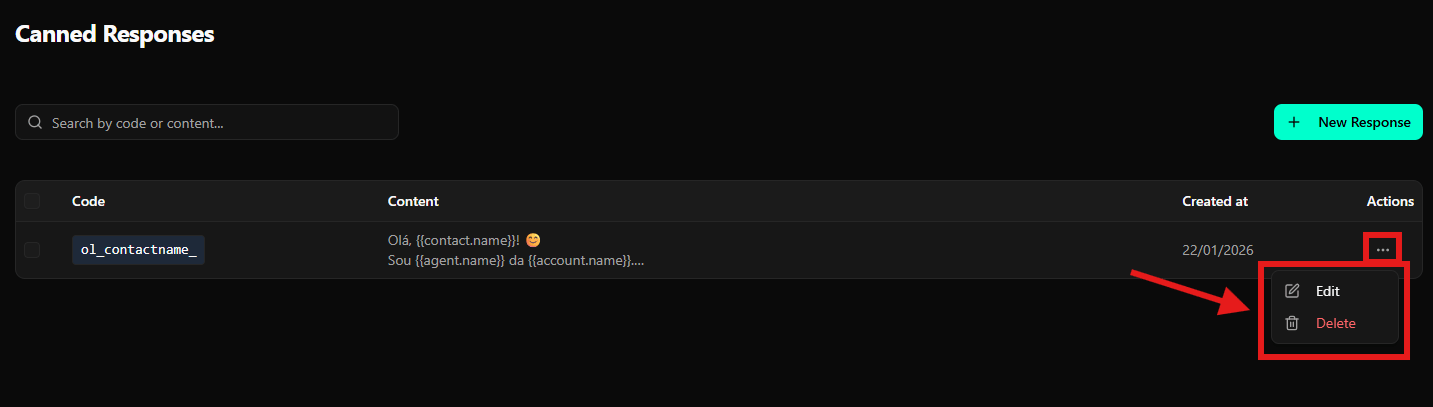
- In the dropdown menu, click View (accompanied by an eye icon)
Executing a Macro
To execute a macro manually:- In the macros table, locate the macro you want to execute
- In the Actions column, click the three dots icon (
...) corresponding to the macro - A dropdown menu will be displayed with available options
- In the dropdown menu, click Execute (accompanied by a play/triangle icon)
Editing a Macro
To modify an existing macro:- In the macros table, locate the macro you want to edit
- In the Actions column, click the three dots icon (
...) corresponding to the macro - A dropdown menu will be displayed with available options
- In the dropdown menu, click Edit (accompanied by a pencil icon)
- A modal similar to the creation one will open, but with the title “Edit Macro” and fields already filled with the macro’s current values
- Modify the desired fields:
- Name
- Visibility (Private/Public)
- Actions (add, remove, or reorder actions as needed)
- Each action’s configurations
- Review the changes
- Click the green “Update” or “Save” button to save the changes
- Or click “Cancel” to discard the changes
Deleting a Macro
To remove a macro:- In the macros table, locate the macro you want to delete
- In the Actions column, click the three dots icon (
...) corresponding to the macro - A dropdown menu will be displayed with available options
- In the dropdown menu, click Delete (accompanied by a trash icon, displayed in red text to indicate a destructive action)
- A confirmation dialog will be displayed
- Confirm the deletion in the dialog that appears
- Deleting a macro is permanent and cannot be undone
- If the macro is public, all agents will lose access to it after deletion
- Verify that there are no processes or users depending on this macro before deleting it
- Consider deactivating or making the macro private instead of deleting it if there are doubts about its future use
Final Considerations
- Clear Nomenclature: Use descriptive and clear names so all team members understand the purpose of each macro
- Action Order: Remember that actions are executed in the order they are defined. Plan the sequence carefully to ensure the desired result
- Visibility: Use private macros for personal processes and public macros to standardize team processes
- Test Before Sharing: Test public macros before making them available to the entire team, ensuring they work correctly
- Documentation: Consider using descriptive names that work as documentation of the automated process
- Regular Review: Periodically review existing macros to ensure they remain relevant and working correctly
- Reuse: Create macros for tasks that are performed frequently, maximizing efficiency gains
- Correct Configurations: Make sure all actions have their configurations filled correctly before creating or updating a macro